I finished a recent blog post with “But it’s done. Next step…how on earth am I going to manhandle the oak frame into place. This is going to be tough.”
I looked into hiring a machine to do the heavy lifting for me but it was going to be about £130 per day and with hindsight of how long it took it would have cost me about £1000 down that route. Luckily for me I have a lovely friend that owns a digger and a trailer. He dropped it off for me, gave me a hand with the first part of the build and then nobbed off on holiday leaving me to crack on with it at my leisure.
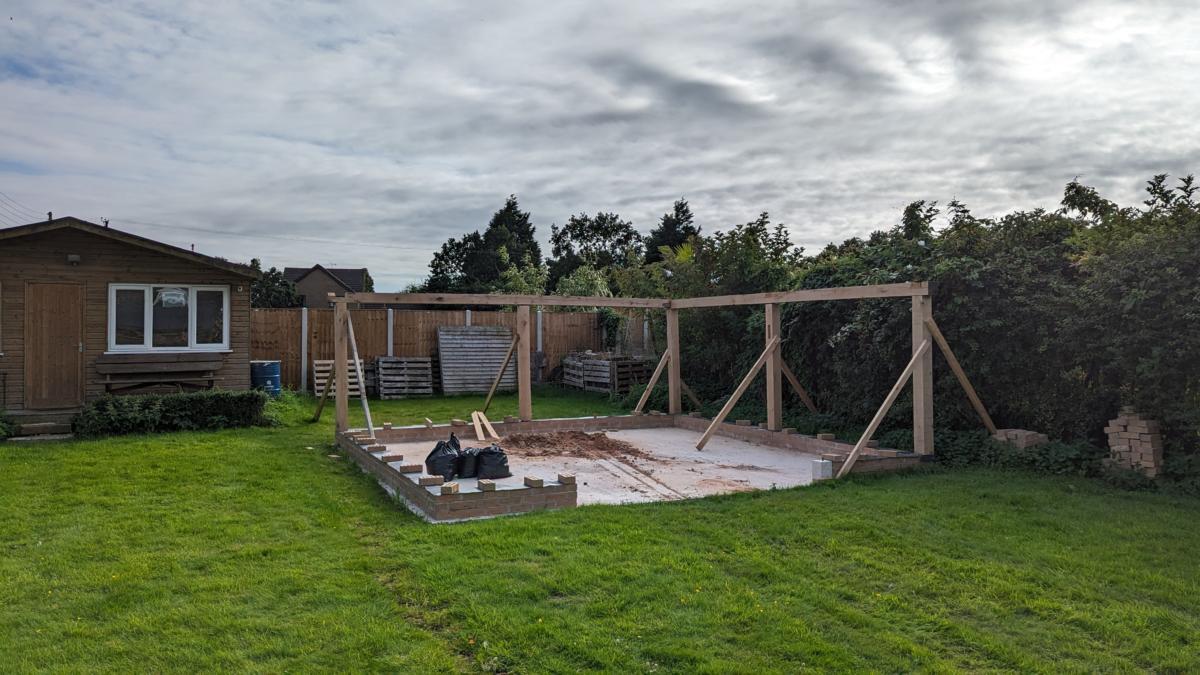
The first wall we put up was the one on the right
By the time we’d constructed the second wall of the frame I was getting a bit better at mortise and tenon joints – not brilliant….but definitely better. Before starting the build proper I spent an entire day making a mortise for the wind brace by hand with a hammer and chisel. Seriously….an entire day to make a practice mortise. I nearly cried. The realisation of how many mortise holes I had to make in this incredibly tough oak was soul destroying. So I rented a chain mortise. By the end of the build I could do a wind brace mortise in 10 minutes rather than 7 hours.

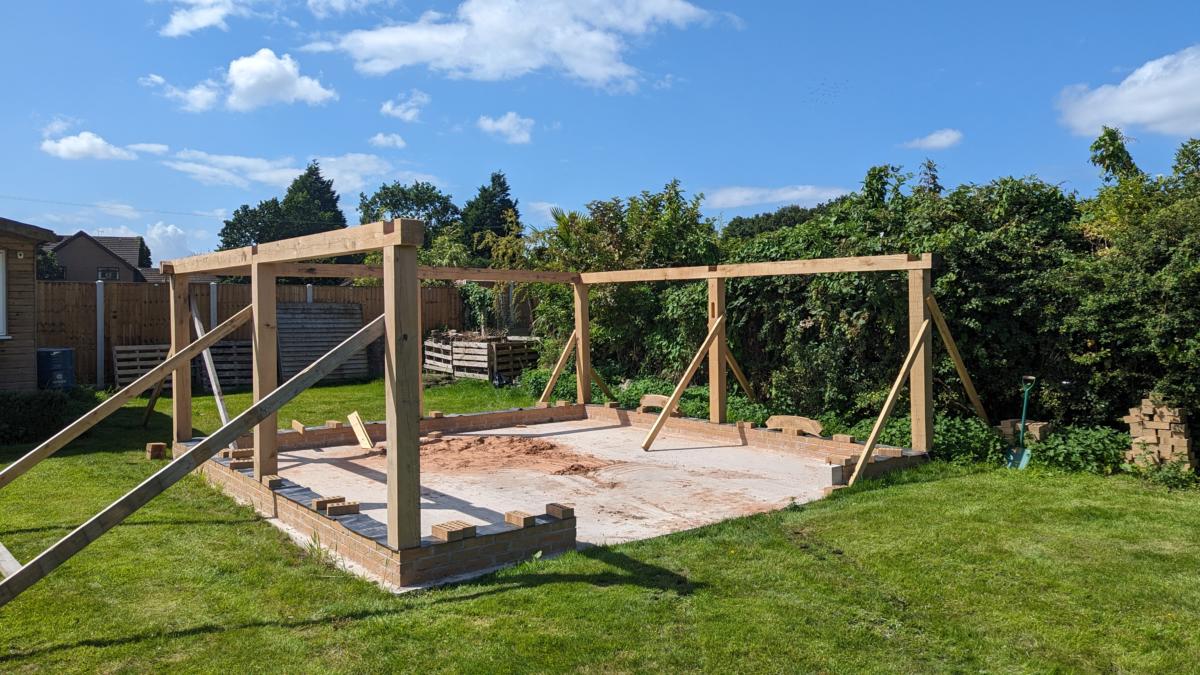
Three frame walls in and things were getting easier and quicker
My lap joints were also getting better given that I’d picked up a few tricks on using the chain mortiser to take material out of the beam and finish off with a hammer and chisel. Took me a while to work out that the measure ticks on the side of the mortiser took into account the curvature of the chain saw.

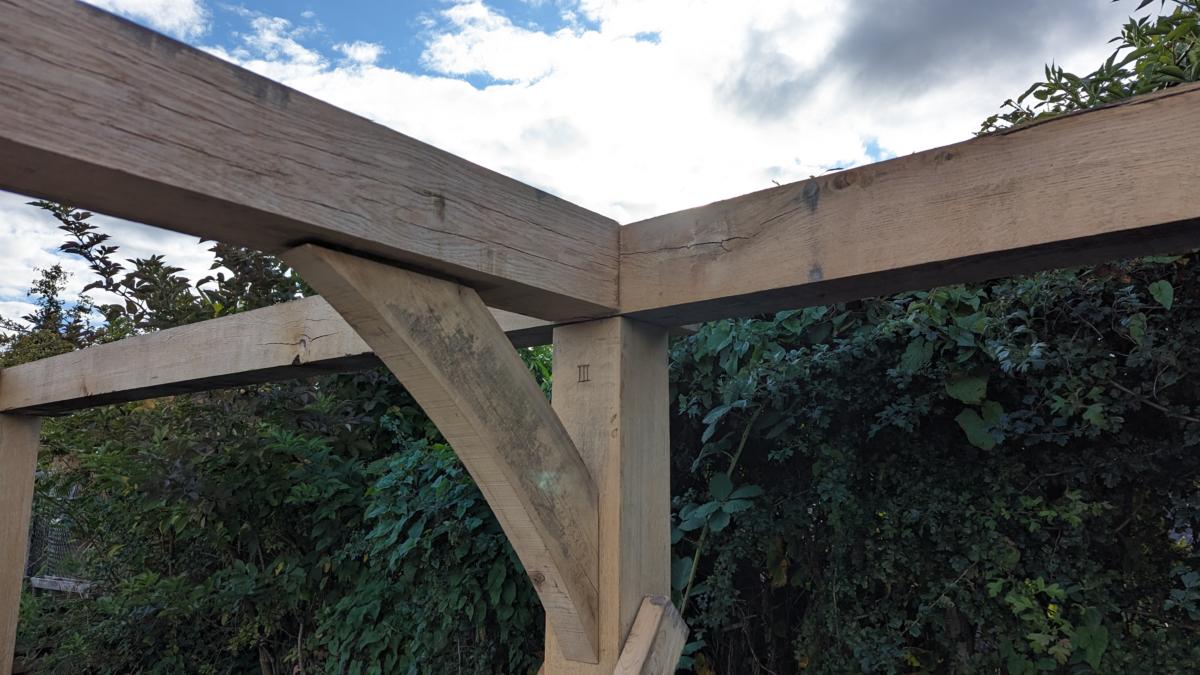
Things start getting a bit complicated when connecting the middle brace. There are two lap joints and two wind braces to consider so stuff really needs to line up. This one turned out pretty well, the wind brace is a bit loose but I’ll fix it in when the frame is finished and the stud walls have pulled everything square.
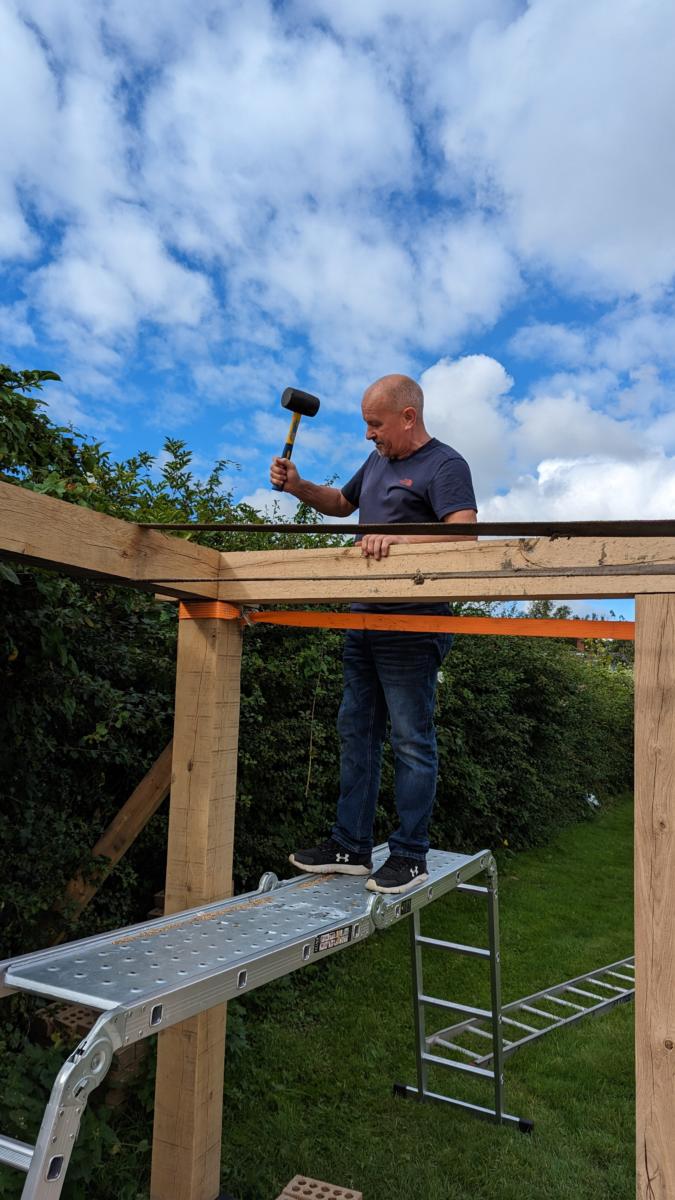
I had numerous special guest appearances from Uncle Chris who provided invaluable advice when it came to getting ratchet straps out and pulling the frame together. He’s a great engineer and can definitely wield a mallet.
Until finally we get to this
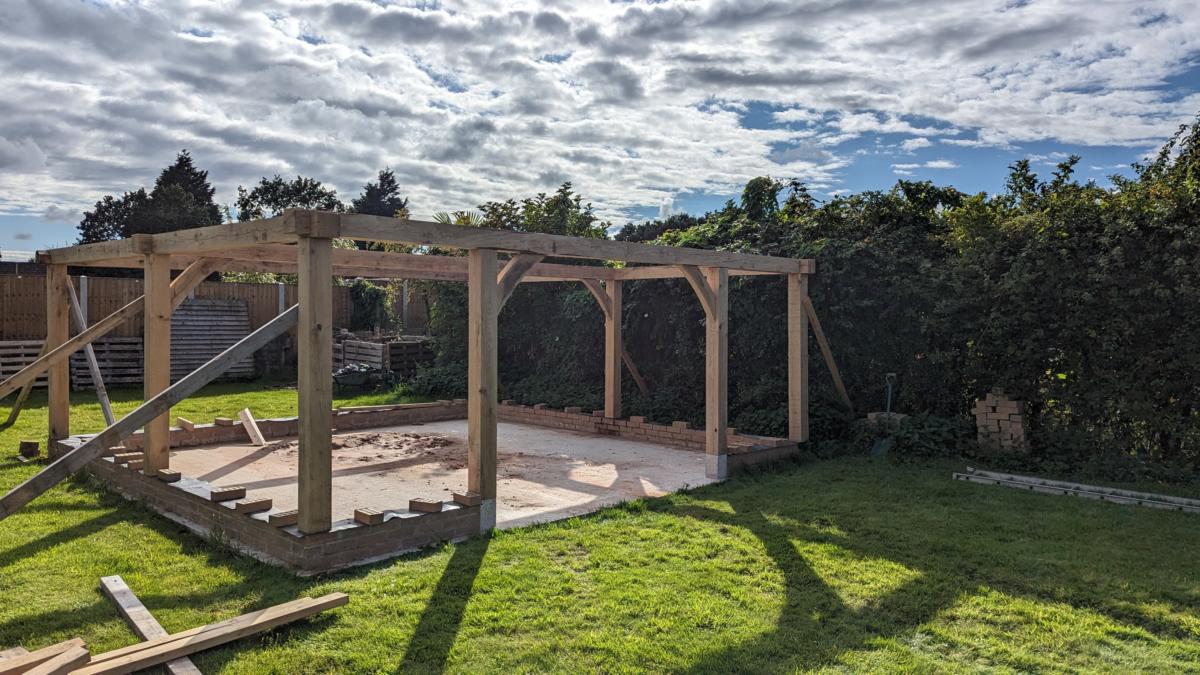
This is the phase that I always thought would be the hardest, and it definitely was. The brick laying was tough but I’ve done it before and knew it was a matter of patience. But manhandling 6m long 150mm square Oak beams was really really hard. Putting lap joints and mortises in there was tough. Manhandling them into place using a digger and mallets and ratchet straps with millimetre accuracy was insanely hard. Trying to get everything square…well that was beyond my capability. Things are a little wonky in places but hopefully the stud walls [ which are the next phase ] will neaten things up.
If I were building this again I’d probably do a better job as I picked up a few tricks along the way and the last few joints were way better than the first. I’d use longer tenons and deeper mortises but taking into account the bows in the beams is just a nightmare.