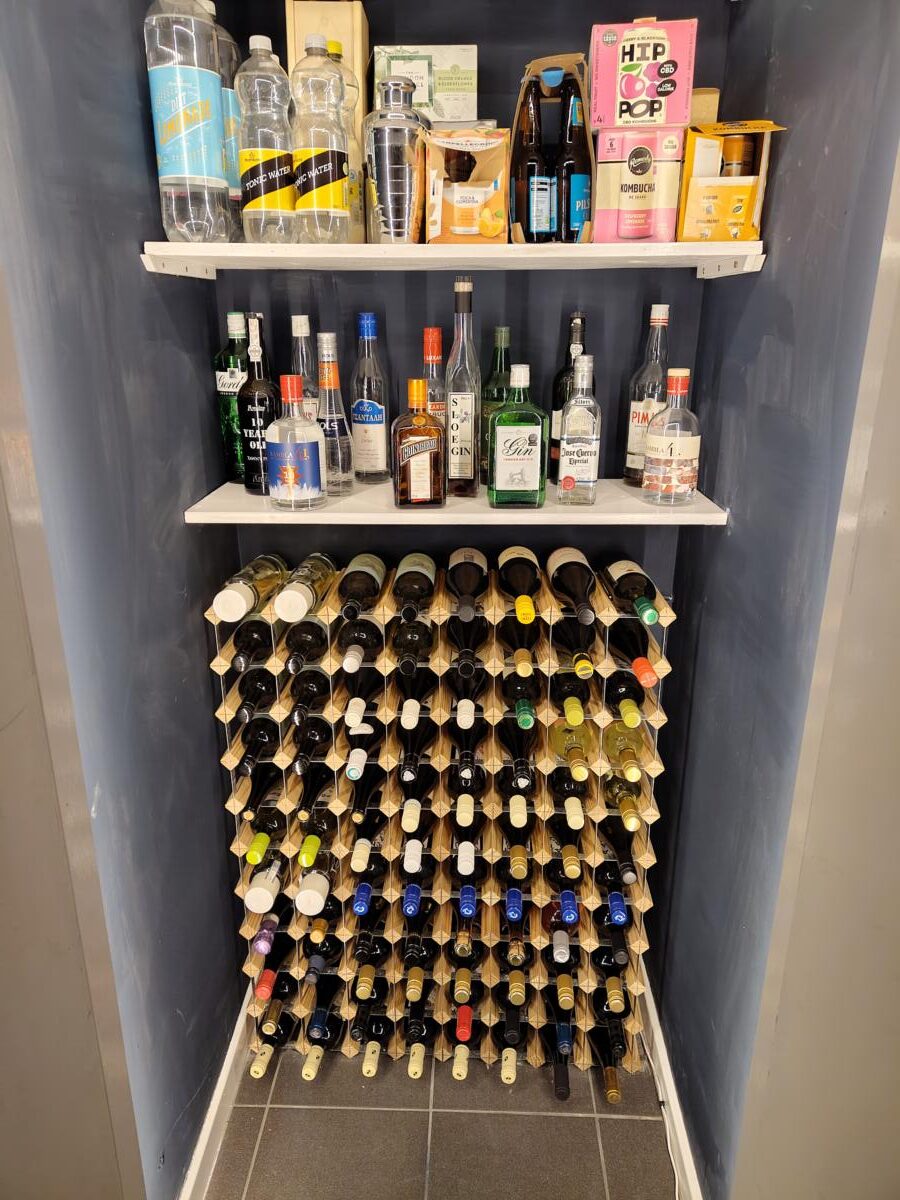
With the wine cupboard project complete all that was left was to fill the wine rack and the wine fridge.
Due to me being a bit of a numpty I managed to miscalculate how much wine was needed….twice
Eventually after a Naked Wines purchase, a Laithwaites purchase and a quick run to Asda it’s a missions accomplished. Well, I say “a mission accomplished” – I’m writing this a week or so later and it’s definitely “was mission accomplished”
Twenty years ago we moved into our house. From a tiny two bedroom apartment in Altrincham to a proper big house with loads of space. I built sheds, I bought furniture, we ate off cardboard boxes for a while….and I bought a wine rack. I’ve always enjoyed wine. Everything about it. Choosing it in the shop, deciding which one to drink, opening it, decanting it, tasting it and then falling over drunk. Love it!
So I found a cupboard just off the, well, it’s the kitchen now, back then it was the conservatory, and it seemed a perfect place to keep wine. For some bizarre reason I put the wine rack on the side wall.
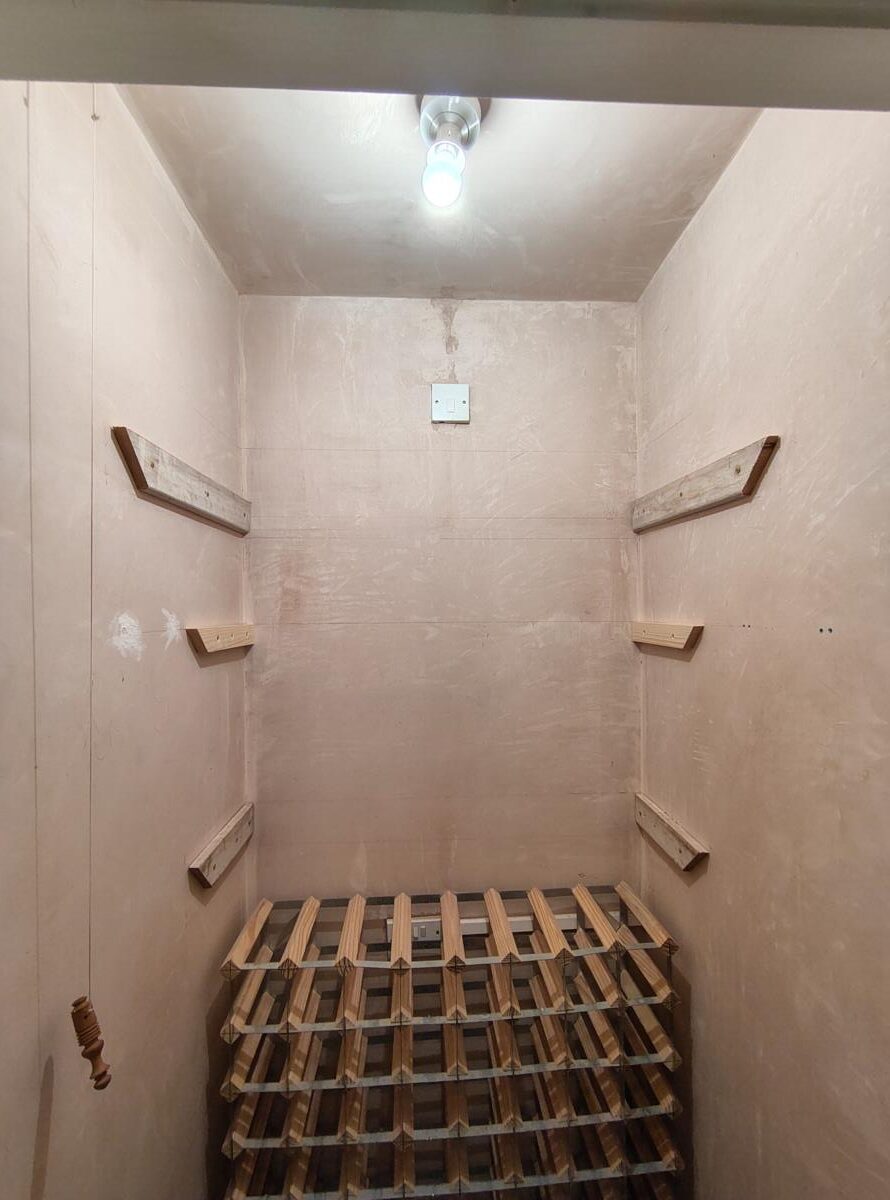
Sorry, best picture I have. I forgot to do my before/after pic – as usual.
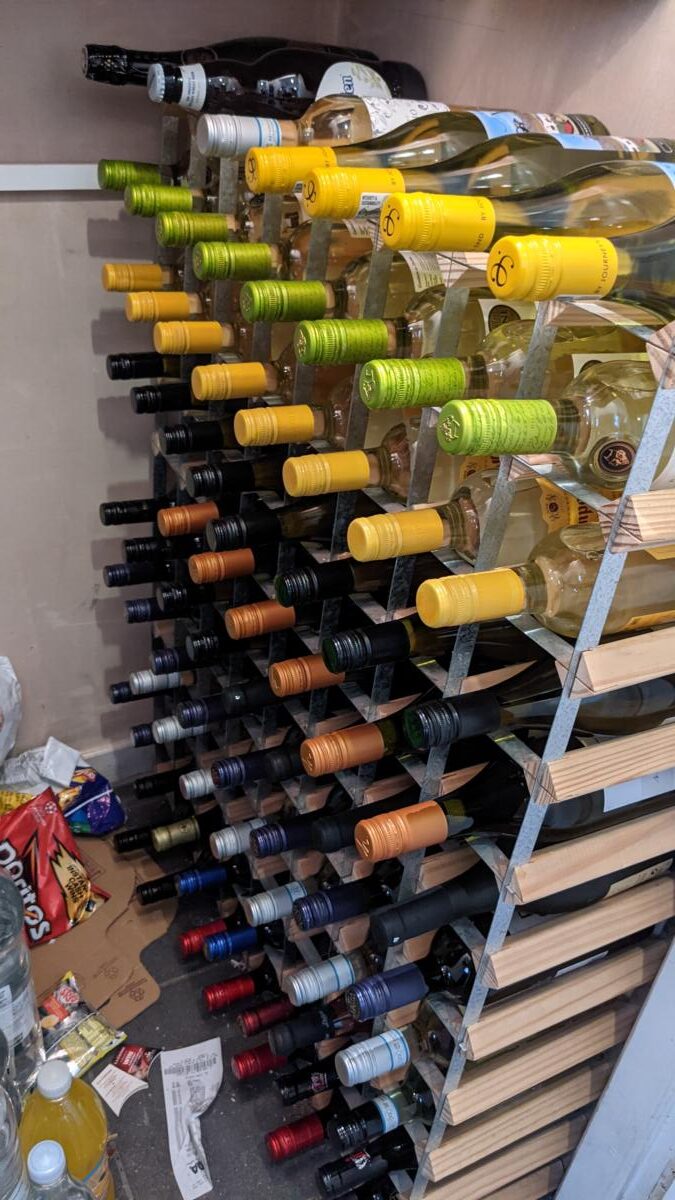
The cupboard itself was a proper shit tip – as you can see above. Crisps, cordials and bizarrely a discarded receipt just lying around on the floor. Bare plaster walls. Unpainted shelves.
This absolutely would not do.
I measured up the wine rack and it appeared it would fit perfectly on the back wall. I took down the shelves that were in there and decided to rearrange them somewhat and changed the shelf holders and painted them white. Also the bare bulb [ hanging out of the ceiling ] and the pull chord [ also hanging out of the ceiling ] would have to go.
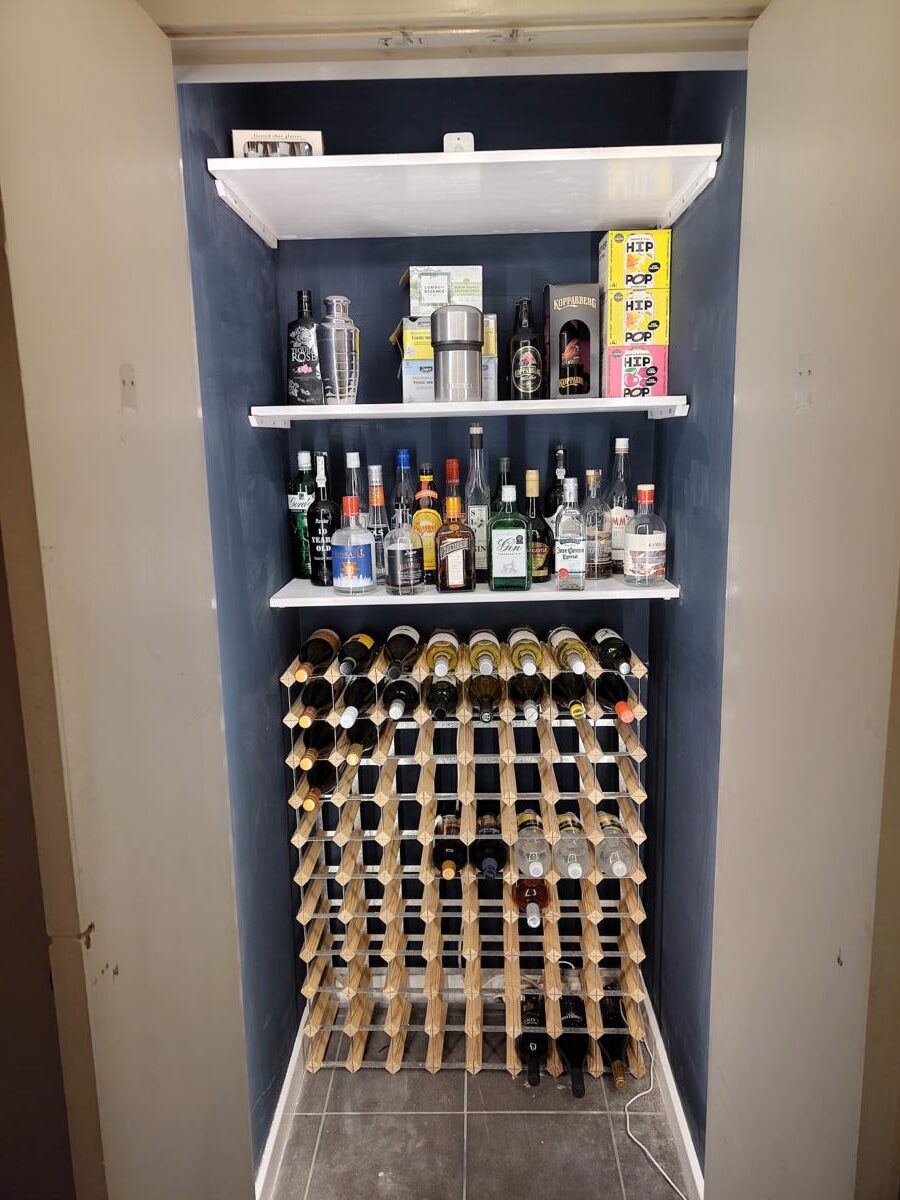
I bought a 5m Philips Hue lightstrip and a Hue PIR so that when I open the wine cupboard doors it notices the movement and lights the room up. There’s even a second or so delay that just adds to the theatre of the whole thing. Beautiful.
I painted the walls with some matt paint I bought from B&M – never ever again. It took about 5 coats and if you so much as look at the wall it will leave scuff marks. One of these days I’ll buy some proper paint and do it again….but for now….check this shit out….
My daughter tells me the photo doesn’t do it justice. She says it looks better in real life. The floor needs a steam clean, the wire to the light strip needs clipping to the skirting board, and as I said – the walls need painting again. But it now gives me joy every god damned time I open the doors. Sometimes I just open the doors to have a look – don’t even bother getting wine out.
The grouting in the kitchen tiles is looking a bit grubby. I considered getting a scrubbing brush and getting on my hands and knees with a bit of soap but to paraphrase The Mandalorian “This is not the way”.
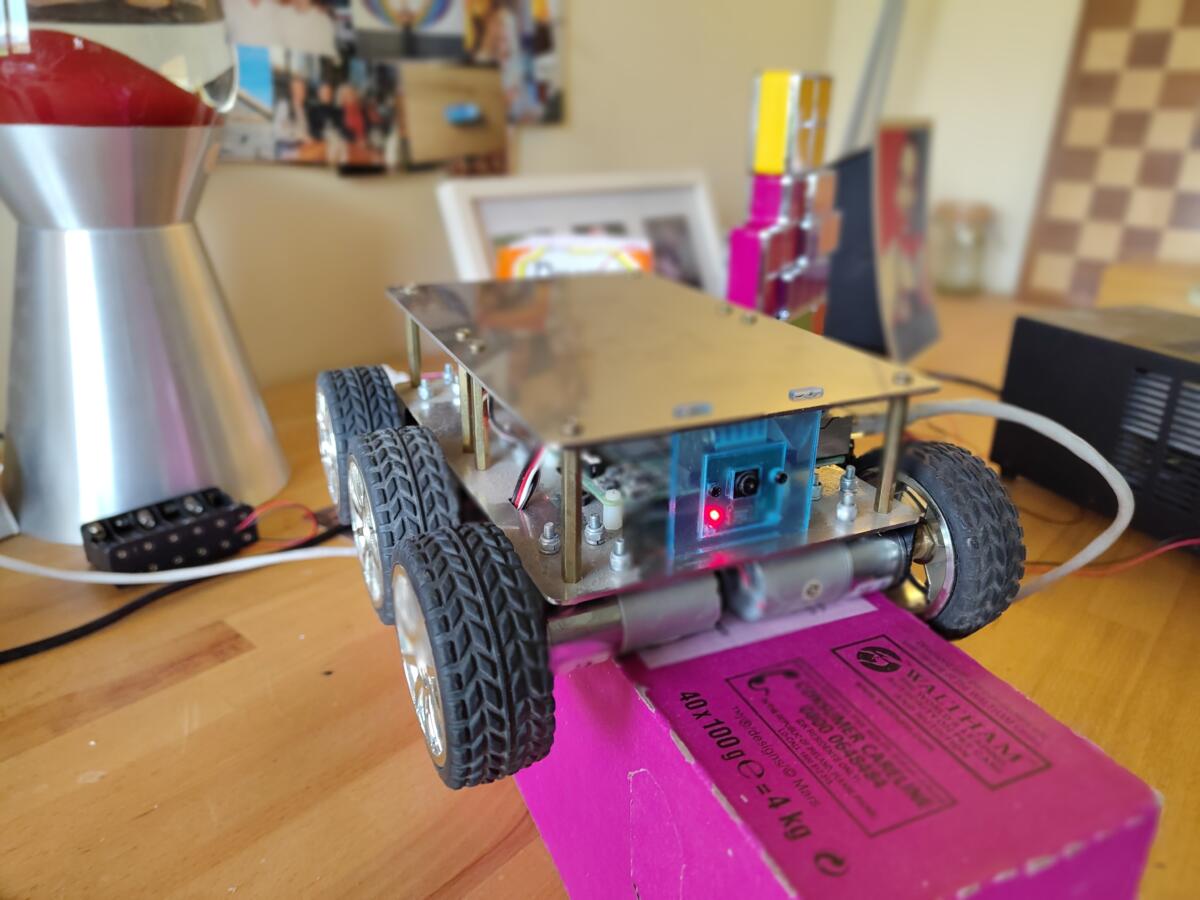
A long time ago when I was bored and had lots of disposable income I bought a raspberry pi powered robot kit and built it.
The observant amongst you will see the camera mounted on the front which I intend to use to guide the robot along the grouting lines. Once this bit is working I will fit some sort of motor powered scrubbing brush which will be used to clean the grouting. Then it is but a moments work to add some mapping code so that my raspberry pi powered scrubbing brush enabled beast can go for a drive around my kitchen and clean everything right up.
It’ll take me months to get it all working but it beats a bit of manual labour.
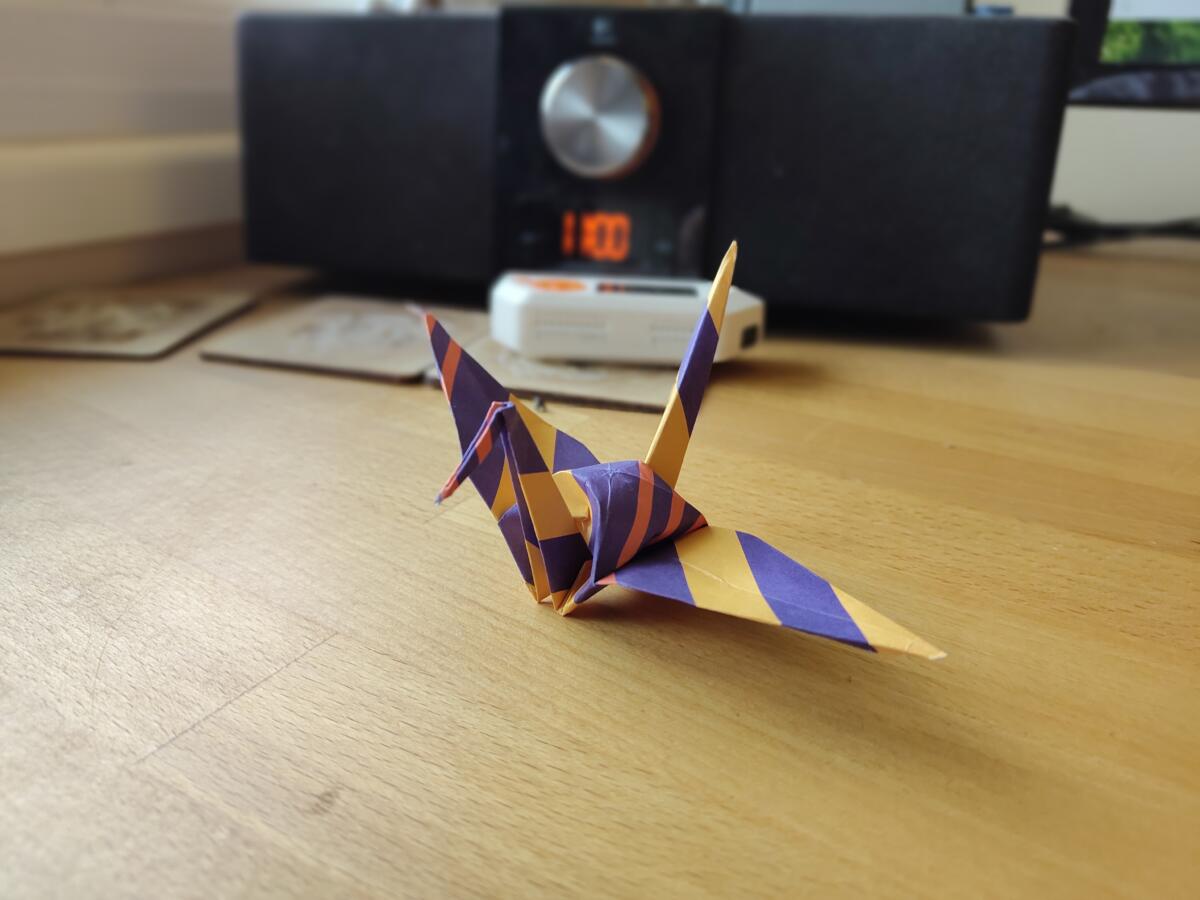
Many, many, many years ago I met a couple of Japanese girls in Cambridge. They were only there briefly and we became friendly. The time came for them to return to Japan and so we bade our farewells the night before their early flight.
I was a bit shocked by a very early morning knocking on my door. When I opened it the girls very ceremoniously presented me with two Origami Cranes that they had made. I kept those origami creations for quite a while but in those days I was frequently moving house by bicycle and splitting my time between my Rochdale parental home and whatever student accommodation I was in and I lost them, along with many other things.
Now that I find myself with a lot more time on my hands I decided to take some Origami paper that we bought for Oli years ago and learn how to fold an Origami Crane.
This is my first attempt. This one is earmarked for Scouse as I made it on his birthday and promised to give it to him as a sign of peace, love and harmony.
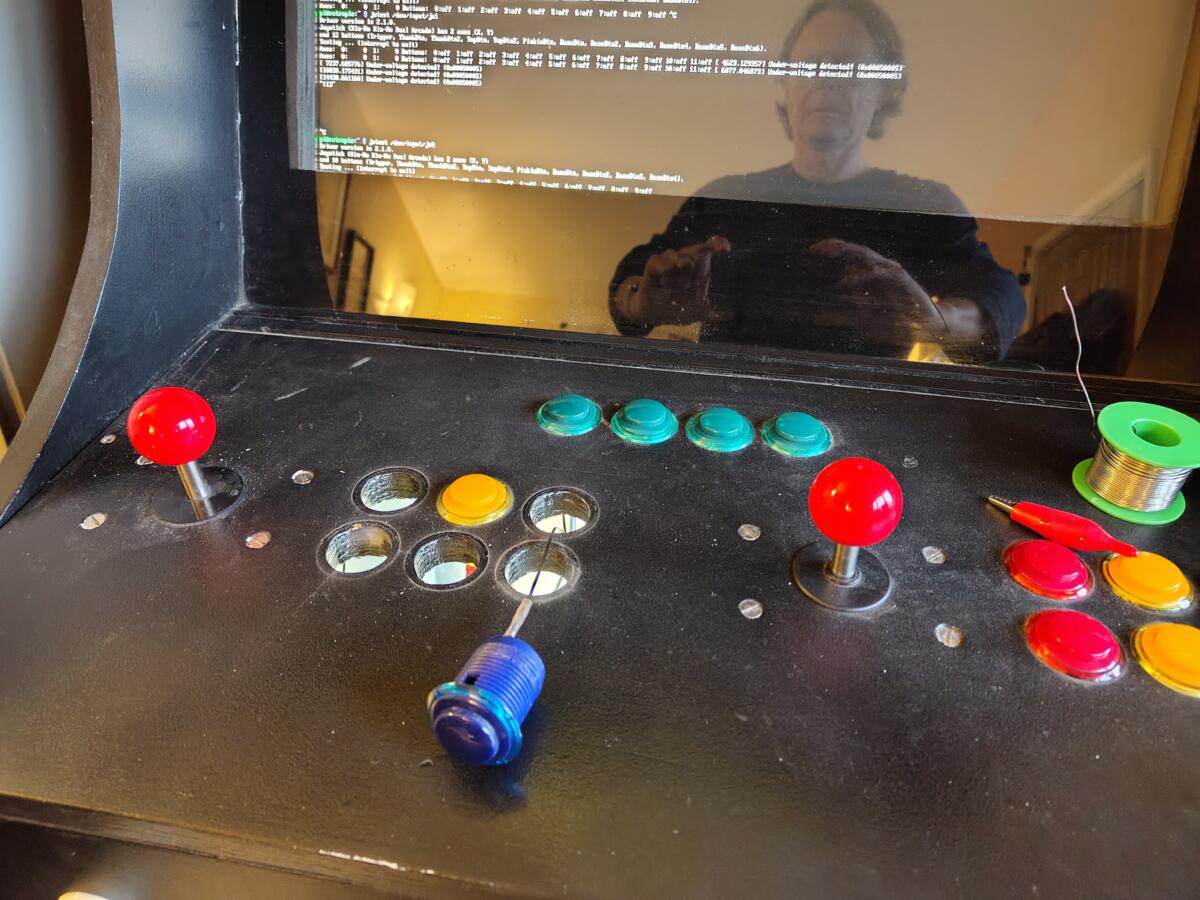
The lighty uppy arcade buttons arrived and I wasted no time in hooking them up to a 240v to 5v transformer that I had laying around.
The scene of devastation that is me mid-project!
After installing the wiring loom of GND and 5V throughout the cabinet I did a quick test.
We have a lighty uppy red button.
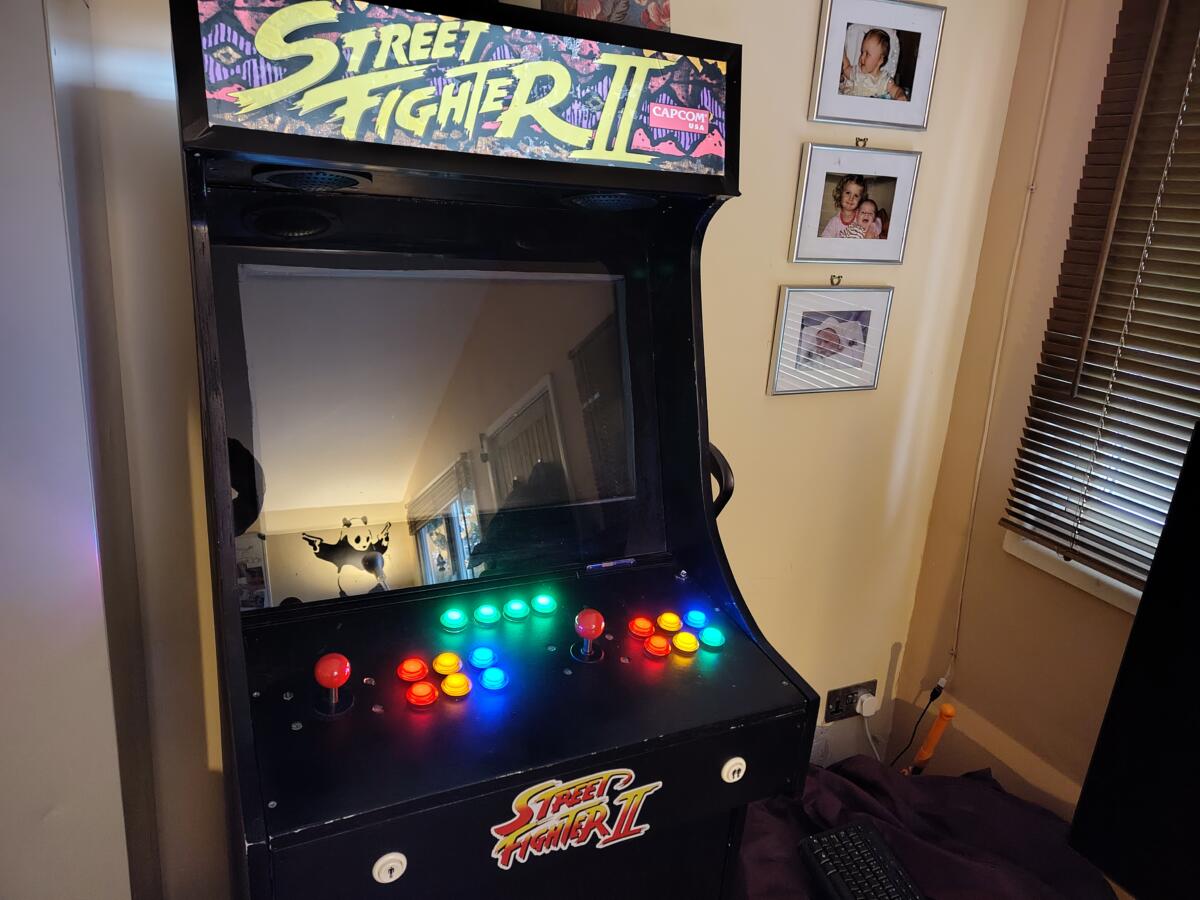
The only real problem now is that each lighty uppy button [ I have 16 of them ] now needs four wires, two for the LED and two for the microswitch that controls the button presses. Subsequently, it’s looking a bit of a mess inside the cabinet. Maybe on Arcade Cabinet Part 3 I’ll tidy all that up.
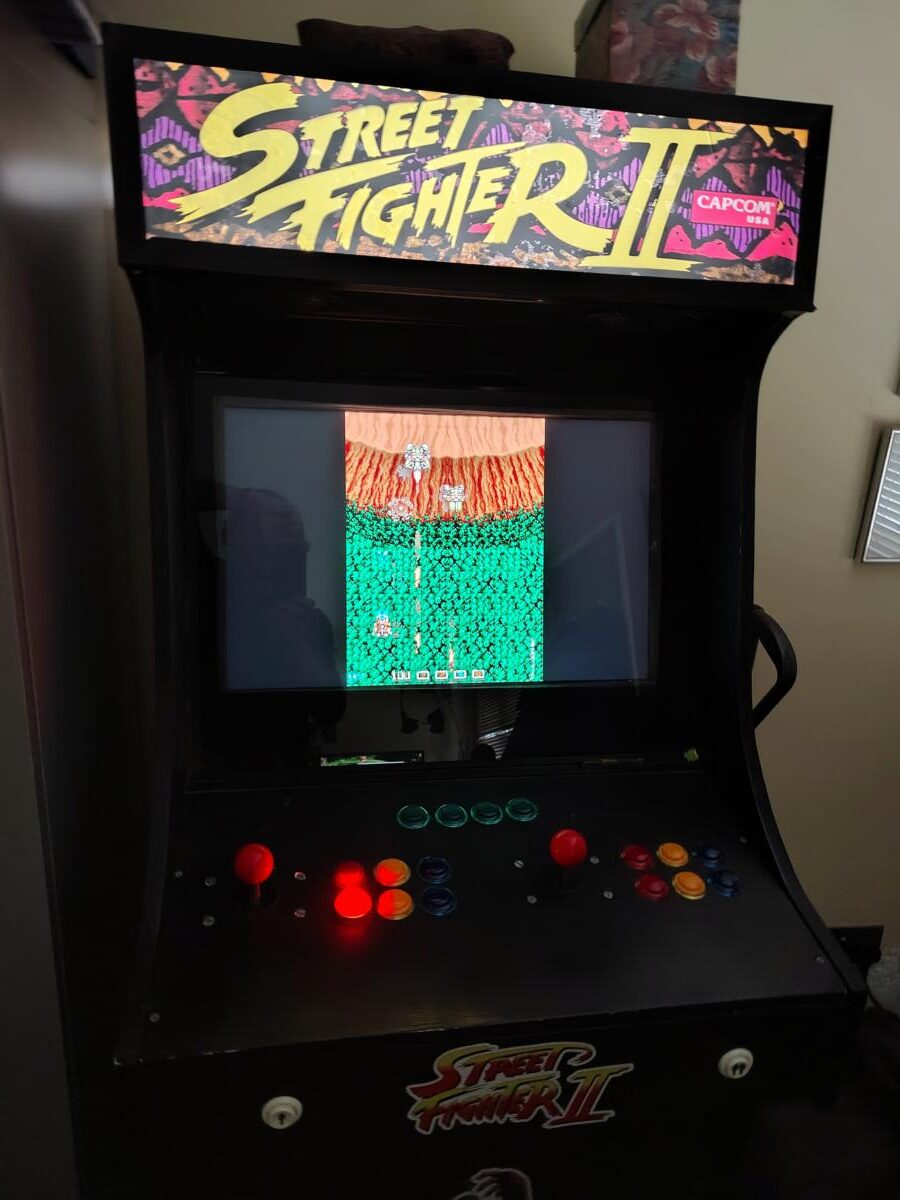
Finally….finally! It’s now ready for the tetris-off. See that bottom right button looks a bit green? It’s because it is. The button people sent me three blue LEDs and a green one by accident. They’ve since sent me out a blue LED but as I write this I haven’t installed it yet.
Yeah so I built an arcade cabinet quite a while ago. I’ve had all sorts of fun and good times with it over the years and it’s now the location of the annual Tetris-off between Charlie and myself. The only problem is when I first built it I didn’t really know what I was doing with the electrics. The earth wiring loom that came with the joysticks was a 4.8mm female spade connector which was absolutely perfect for the joysticks, but the buttons had a 2.5mm male spade. So being the “it’ll do” person that I was I put the 2.5mm spade into the 4.8mm female and crushed it with a pair of pliers. This worked ok’ish. Every now and then a button would stop working and I’d have to go digging around inside and make a repair.
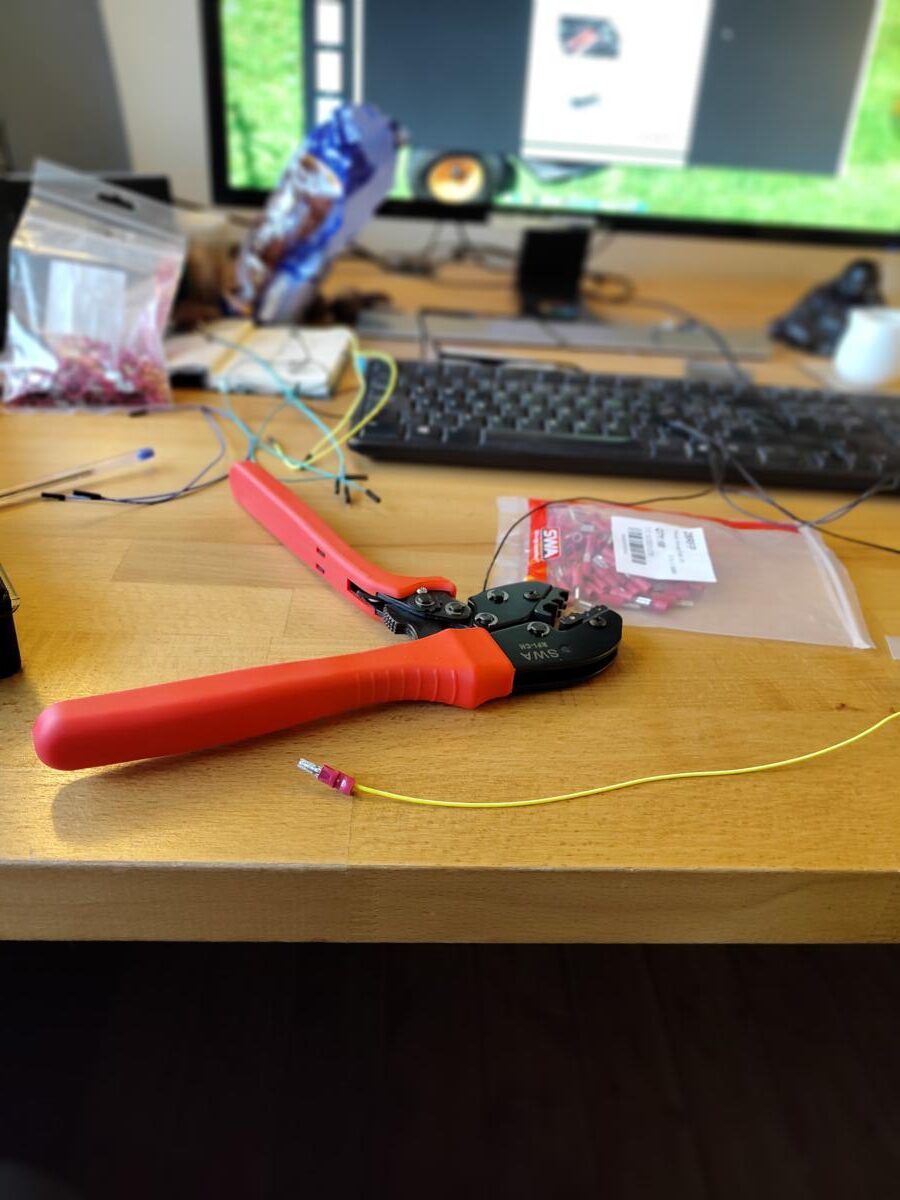
Ratchetting Crimper – beautiful bit of kit
Fast forward to November 2025 and I thought to myself “must do a bit of a service on the arcade cabinet and make sure everything is working for the Tetris-off”. So I fired it up and true to form one of the buttons wasn’t working. So I opened up the cabinet and went inside. Pretty quickly found the dangling wire and reattached it. In doing so I managed to dislodge two more connections and in fixing those connections dislodge some more. I was properly pissed off. Didn’t even need the original broken button for the Tetris-off anyway.
Anyway, given that I’m now more of a man of leisure I tend to do things properly and make sure I don’t have to fix them again in the future.
So out I went to the local electricians shop place which is like a trip to Aladdin’s cave for me, and picked up the new crimper pictured above and a selection of connectors of different sizes. Turns out if I’d gone to an online components shop I’d have saved a fortune but you live and learn…plus I wanted them that day because despite my mature years I’m still an impatient bugger.
I started taking the buttons out one by one and doing a better 2.5mm female spade connection to the 2.5mm male spade connector on the button. Because I’m doing it properly I had a bunch of black wire that I made connections with a 2.5mm female spade on one end ( for the GND connection of the button ) and a 4.8mm male spade on the other end. The goal was to make it easy to identify the GND connections from the signal connections. Incidentally I also used the appropriate coloured wire for the signals, so now the red buttons have a red wire and the blue buttons have a blue wire.
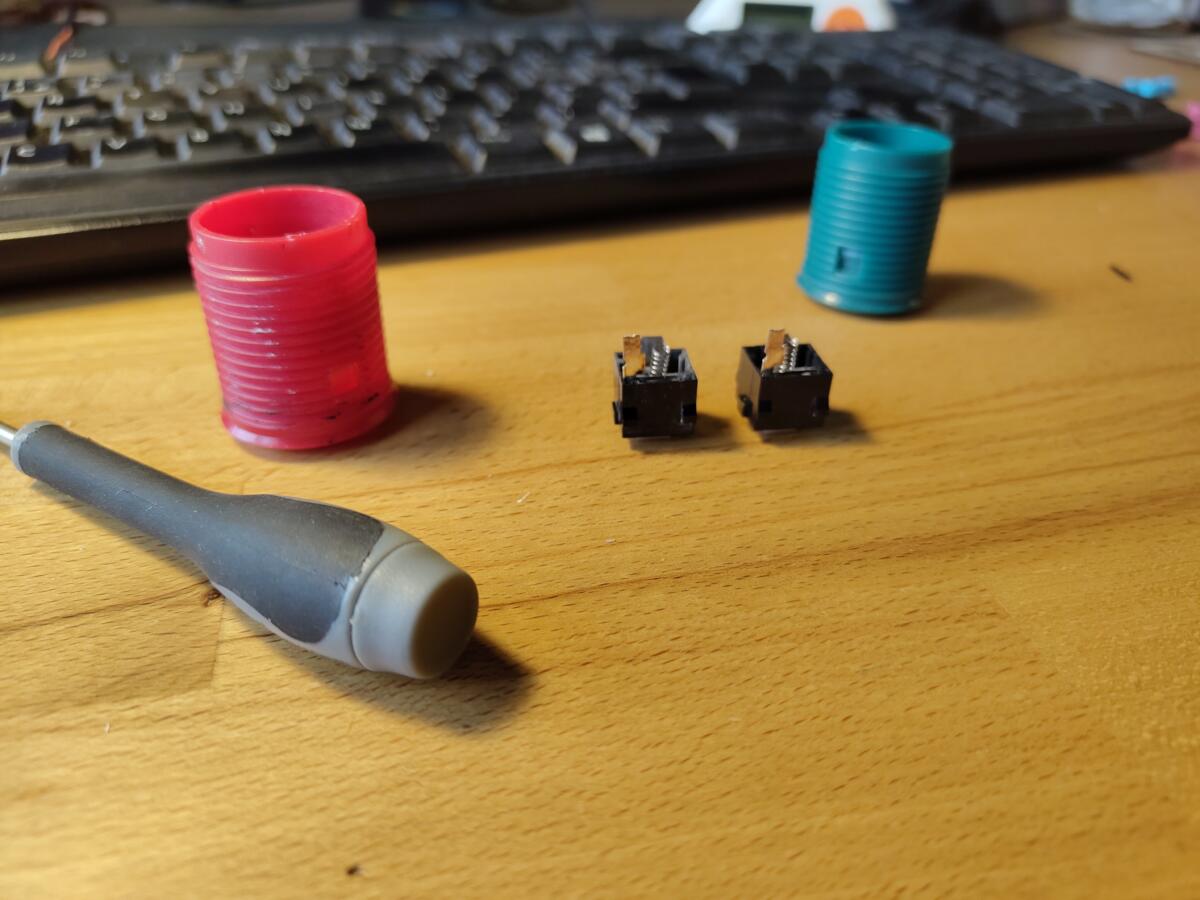
Everything was going swimmingly until I came across a few buttons where the connector snapped off after I disconnected/reconnected it one too many times. They’re pretty flimsy connectors and not really designed to be mucked about with by a clumsy oaf with a pair of pliers. Rather than just buy some new buttons I thought I’d break out my trusty Dremel and my soldering iron and repair them. How hard could it be?
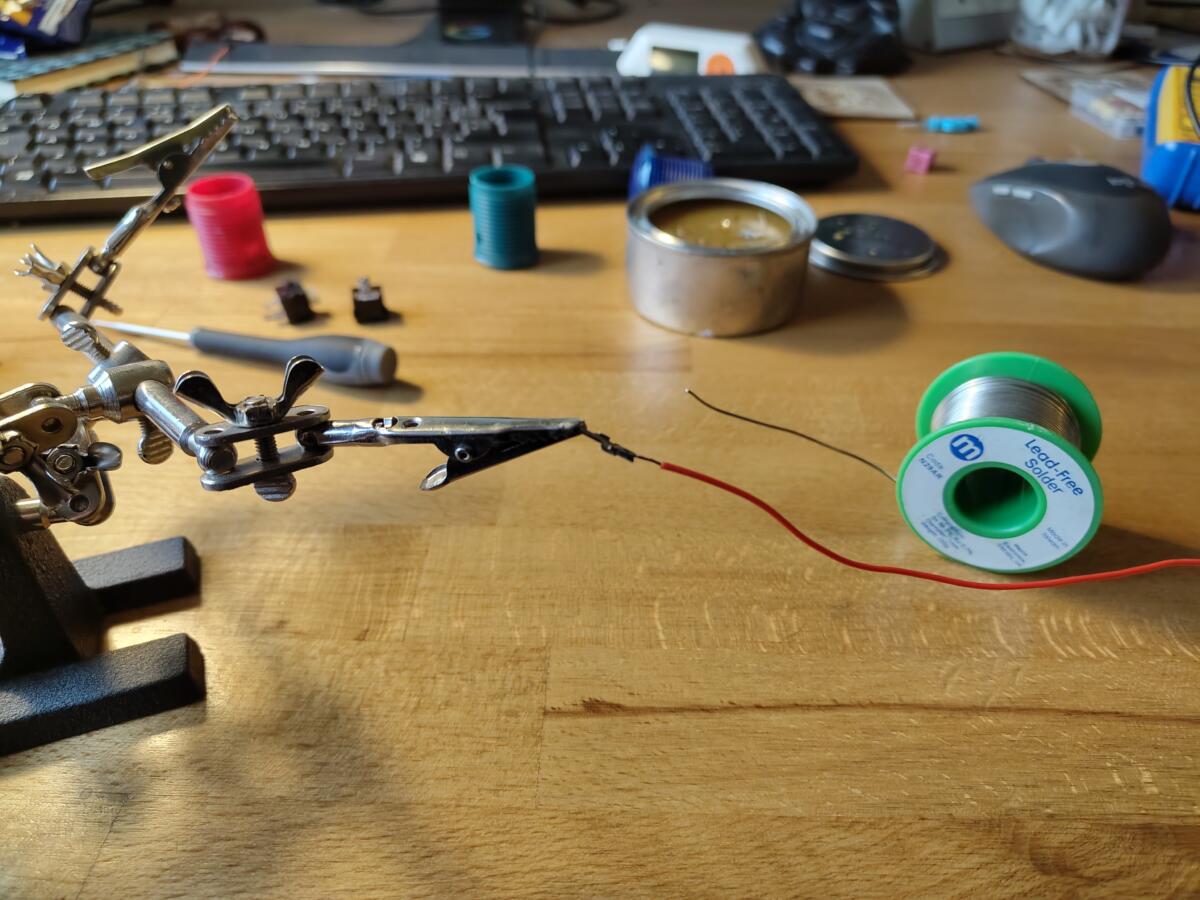
Buttons and microswitchesSoldering up the connection for a red button
Turns out it wasn’t really that hard. I managed to get two of the buttons working again but the green button was properly cabbaged and I’d have to buy a new one. Slightly annoying, but not the end of the world.
Whilst looking at green buttons I saw that you could now get a green button with an LED inside it. God damned lighty up arcade buttons! How had I not heard of these before now? So I ordered four green buttons and four red buttons to give it a bit of a test run before committing to all sixteen buttons.
People who know me will know I likes me a bit of a Raspberry Pi. I use them everywhere to do everything from raising chicken coops, playing Image Fight, summoning cups of tea and controlling various parts of my house. If there was an option to fix something with a nail and a bit of string, or to build an ARP sniffing raspberry pi housed in a 3d printed weatherproof box running off a solar panel then I’d be out shopping at 3dprintersandsolarpanels.com
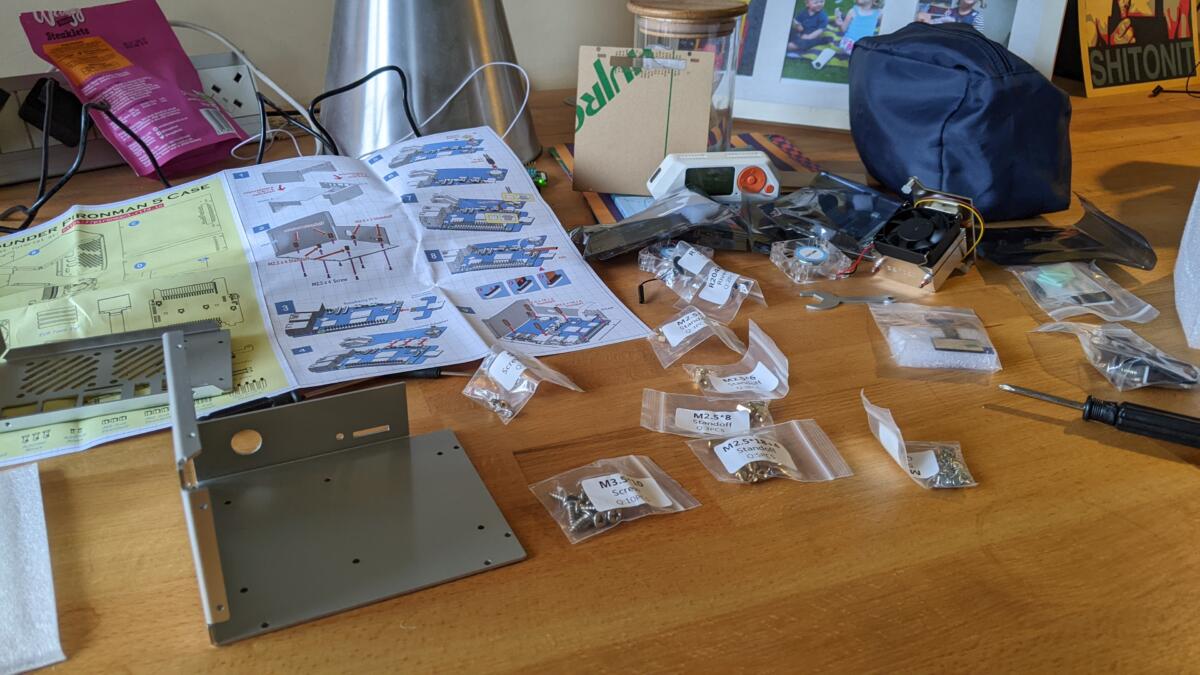
Anyway, I noticed that one of my Pi’s constantly had the cooling fan running. Since it was beside me on my desk in the office the noise started to piss me off. So I looked into all the /boot/firmware/config.txt type stuff and set it all up. Still the same. I started digging around all the proc files and everything seemed to be setup as it should. Still the fan span. So I thought “maybe it’s a dodgy fan”. I could get a new one….or….or… I had just been reading about a beautiful new Pi case with a processor fan, two more RGB fans, some LED’s built in to light it all up and a little tiny screen that shows the IP address, disk space, temperature…all that sort of gubbins. It was [ as you may have guessed ] marketed as a Pironman5.
It came in many pieces.
I took my time building it. Enjoying every moment. Trying to build it perfectly. The perspex sheets that made up the case came covered in brown sticky paper. As I peeled it off some of it got left behind around the place where “Pironman5” had been printed. I could have used a bit of rubbing alcohol to remove it. I could have used some blu-tack. I probably could have just rubbed it off with my finger, but noooooooo, nooooooo I had a screwdriver in my hand. “I’ll be gentle” I thought. I’m an idiot. Scratched the beejayzuz out of it. Oh well.
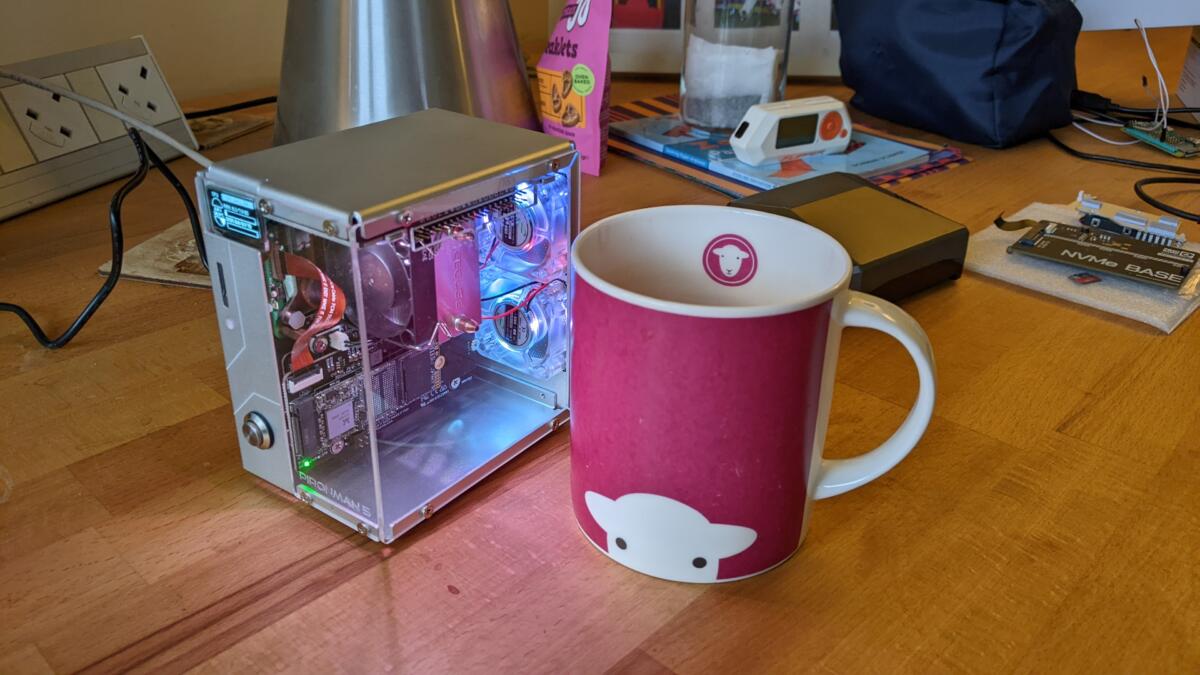
Herdy cup added for scale
It all worked perfectly after building it. Only annoying bit is that the processor fan still spins constantly. Pretty sure there is a hardware fault on the board where the FAN PWM is going to GND somewhere. However, it’s now in a case which makes it quieter and it’s now no longer on my desk….it isn’t even in my office so it doesn’t bother me at all. It’s taken over the duties of my tea summoner and my spotify connector so it’s taken two pi’s off my network and I suspect it will become my git server.
In summary, buy a Pironman5 for your Raspberry Pi 5 – they’re ace. Don’t scratch off the brown paper with a screwdriver – that’s just folly. I’ll be buying another one to house my baker.
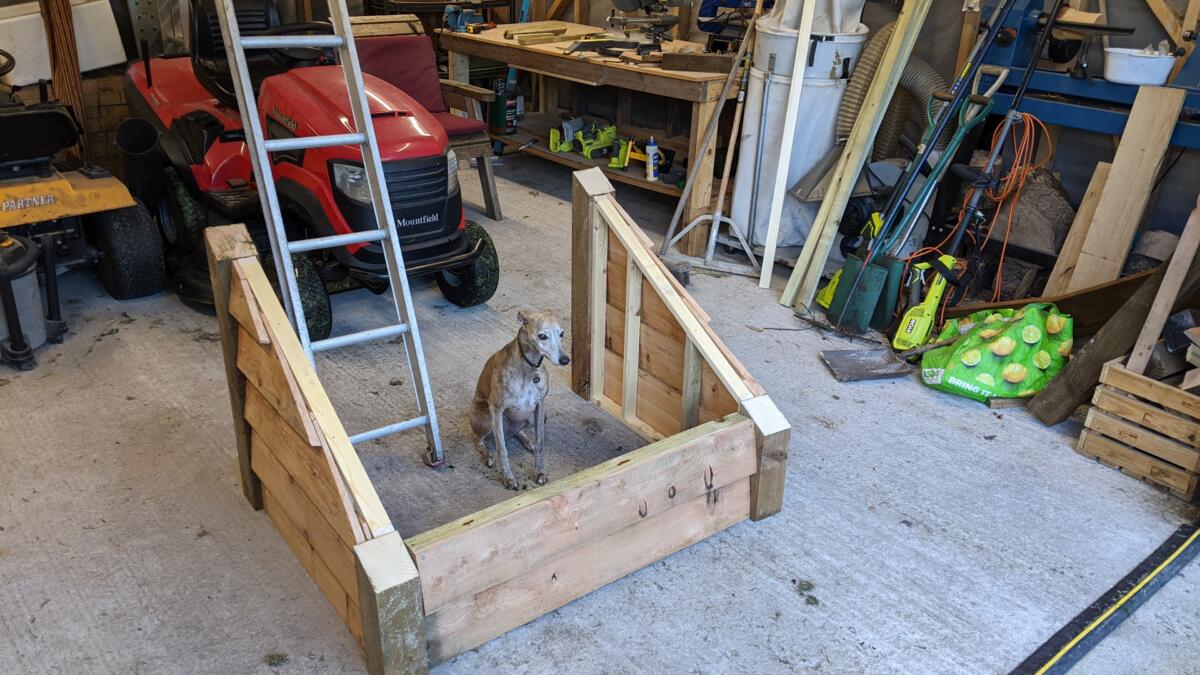
During lockdown we got adopted by a cat. Pickle, AKA Moses, we found his owners and returned him but he kept coming back, probably because Emma kept feeding him. Eventually we started letting him come into the house but he really is a smelly cat and it was sometimes a bit unpleasant. I’m not 100% sure if it was him or our actual cat Willow that would poo in the house so we ended up kicking them both out. This is fine in the Summer but I always felt a bit sorry for him in the Winter.
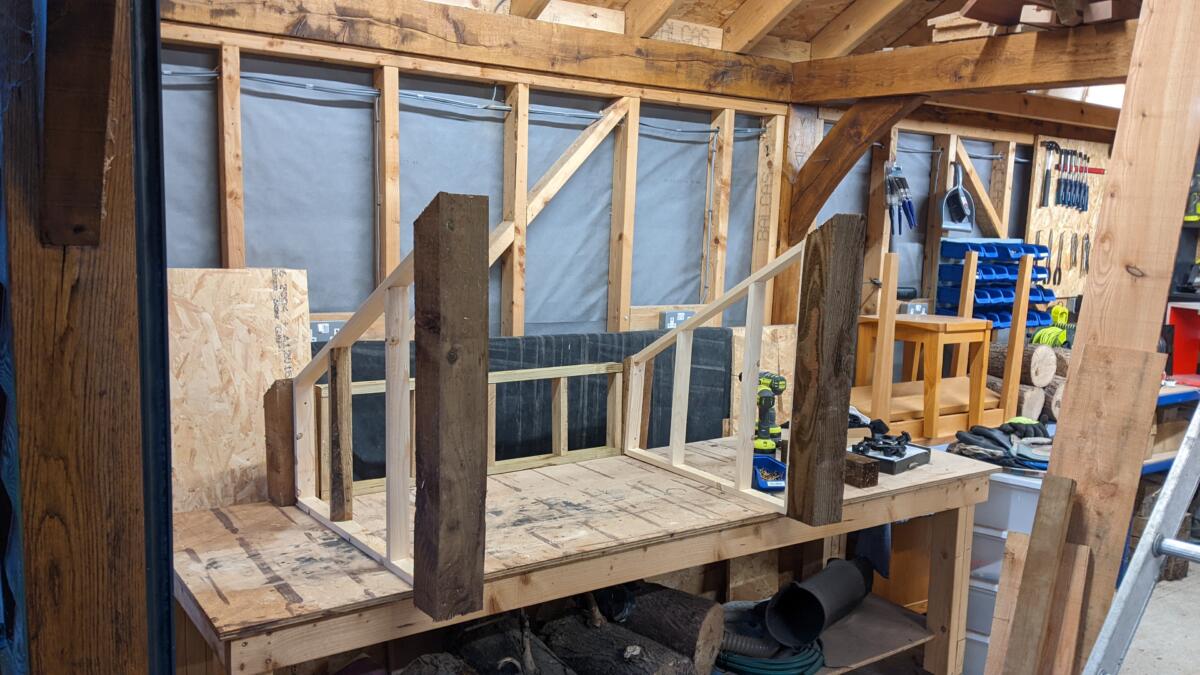
So I decided to build him a house.
I had to buy some 2×1 wood to make the stud walls but all the other materials were leftovers from building my workshop.
I gave it a test run with Violet to make sure it was big enough.
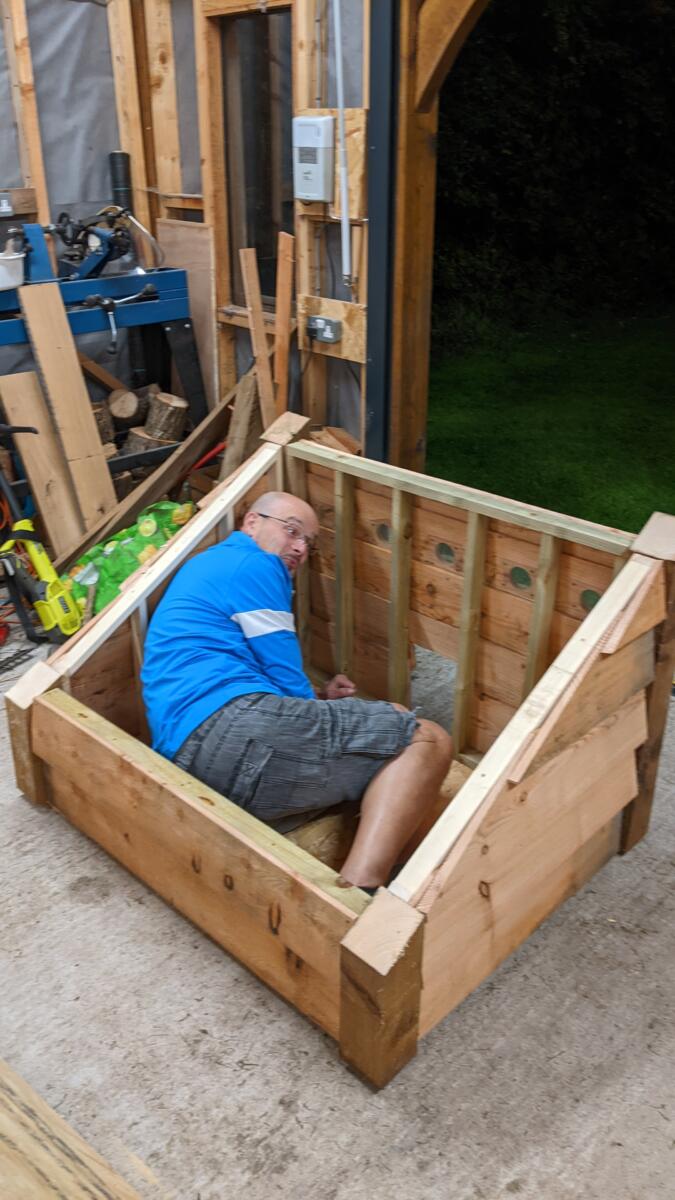
Then I gave it a test run with Jason to be doubly sure. Since all 6’3 of Jason can make it in there I’m pretty sure a cat will be comfortable
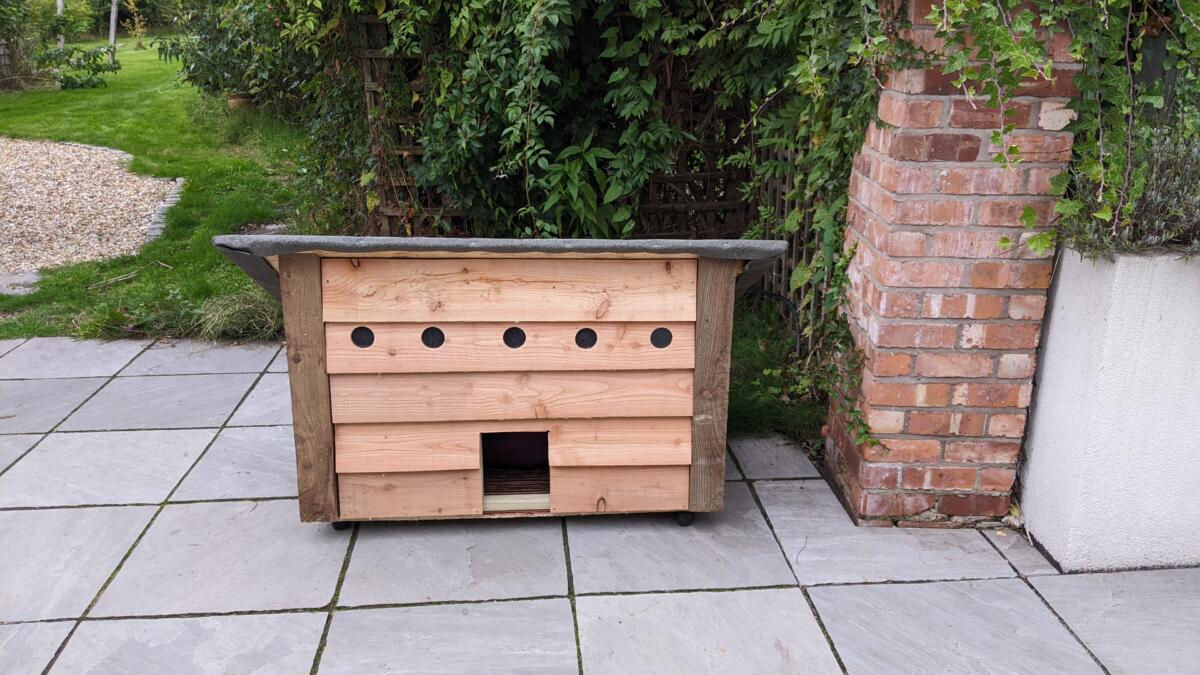
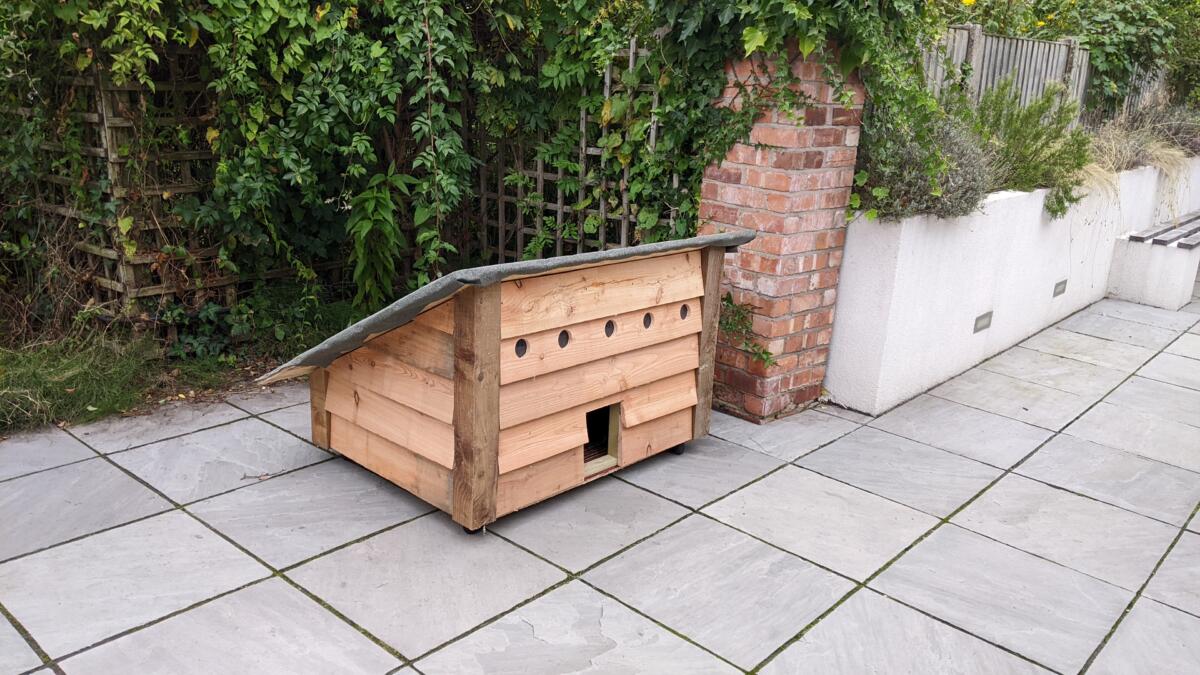
It took two of us to carry it down the garden as it weighs an absolute tonne. It’s mounted on wheels to move it around a bit. It’s not 100% finished as the roof is just resting on the top but it’s pretty heavy so will survive all but the strongest of storms. The roof covering is a bit rubbish but I’ll make improvements over time.
It took Pickle about 5 minutes to move in after Emma placed some cat treats in there. The dog is also quite interested but hopefully she can’t fit through the hole. Moderately proud of myself.
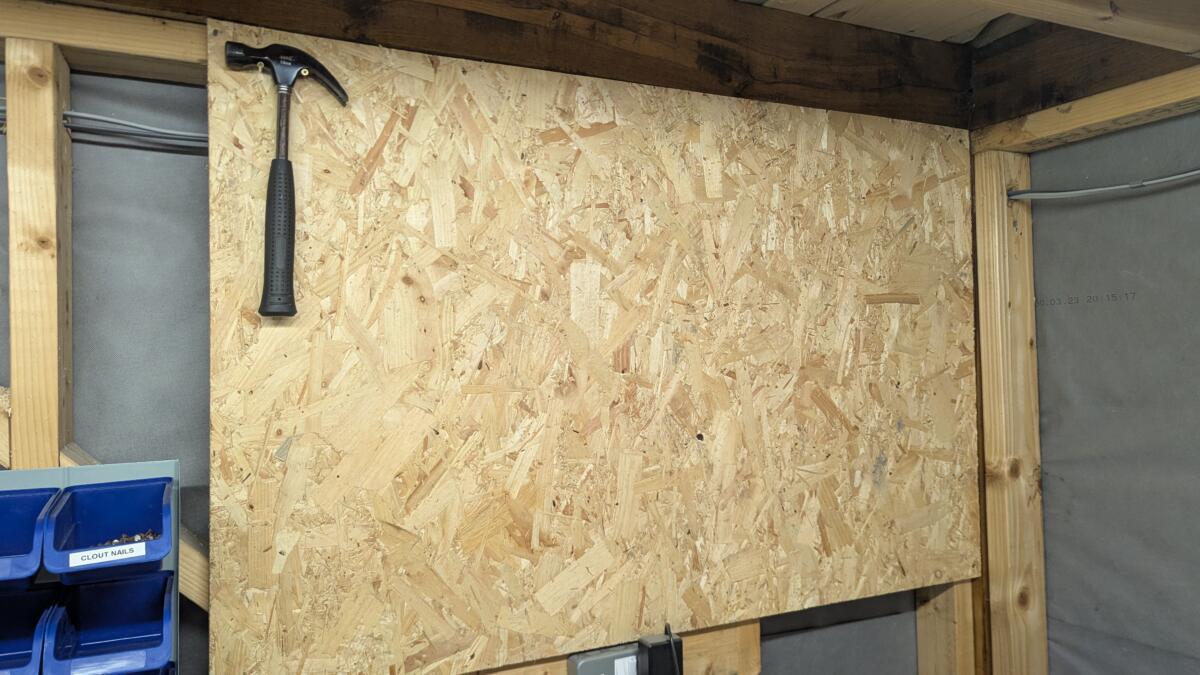
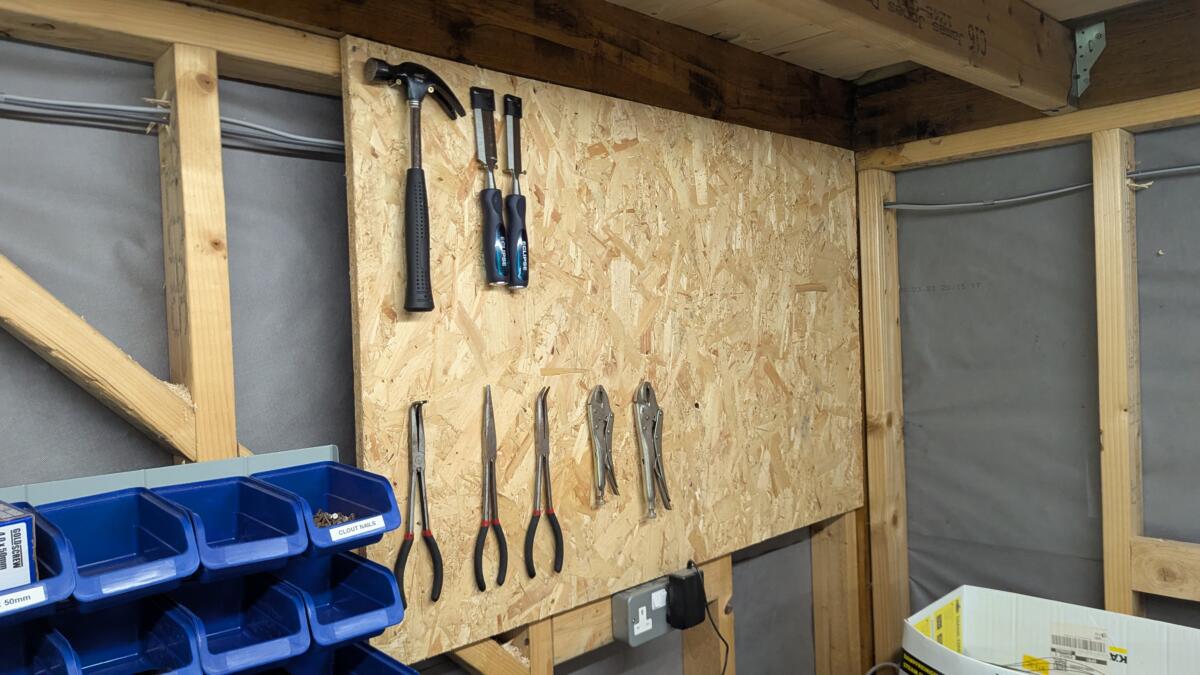
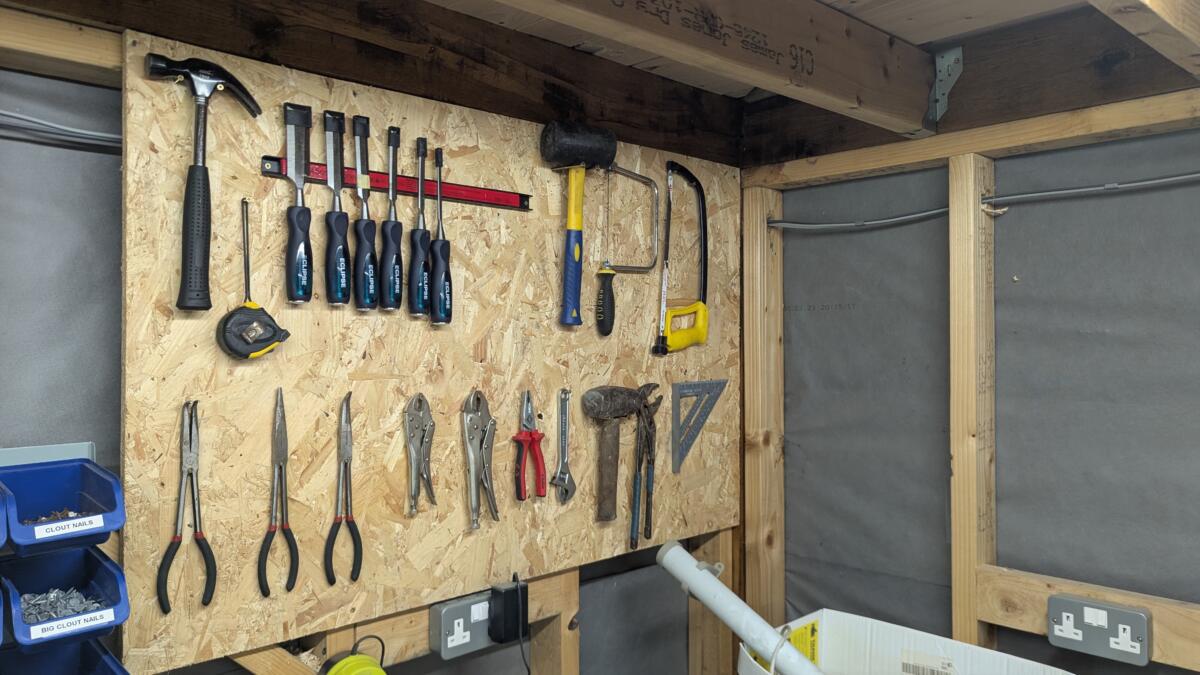
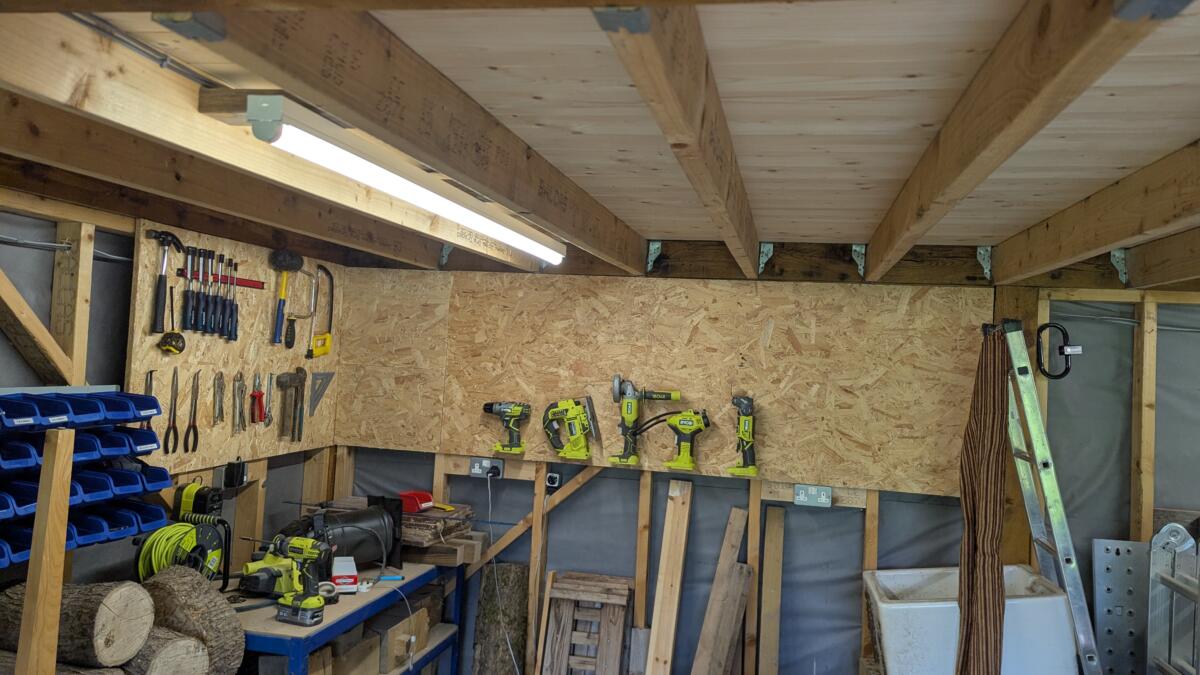
My newly built workshop was beginning to look a bit of a mess with tools strewn hither and thither. My good friend Jason made a “shadow board” in his garage and so I thought I’d do the same with some left over OSB.
You should always start with a hammerThe chisel mounting thing didn’t quite work out, as you’ll see in the next picture.I had to use a magnetic strip to hold the chisels up. Worked out alright though.
So far so good. But I still had a crap load of Ryobi tools scattered around the workshop. My first thought was to put up another piece of OSB and then have little shelves for the tools to sit on. This didn’t feel like a great idea though, the shelves may get knocked and then an expensive bit of kit falls on to a concrete floor and breaks. I realised I couldn’t be the first person to be suffering from this problem so I did some googling and found these Ryobi-green plastic wall mounts that you screw in and mount your tools on the fake battery connector shape thing that protrudes from the mount.
Genius
I only ordered 5 as a bit of a test, but they’re great. I’ll be ordering 5 more….hmmmm, maybe 10.
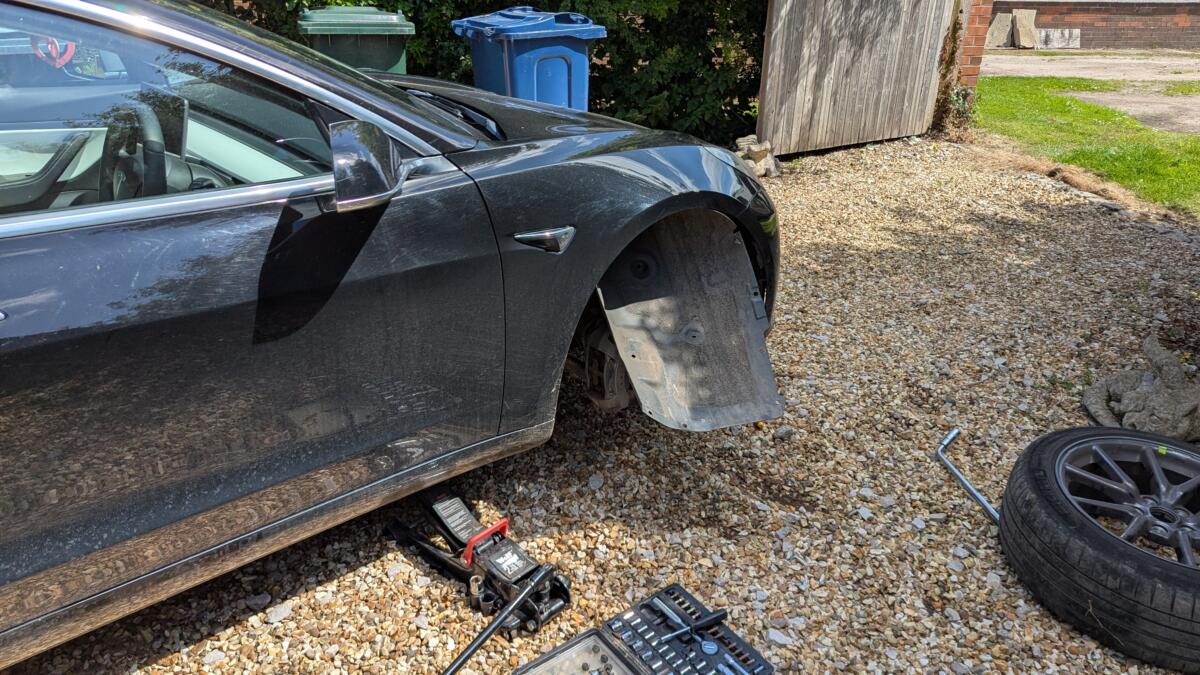
We’ve been having a minor issue with the Tesla. If you hit a bump in the road with sufficient force then the whole car goes haywire and the cruise control stops working, the regenerative braking stops working, ABS stops working – all sorts of crazy stuff. As soon as you stop the car, get out and lock it then the whole thing resets and it’s back to the normal “drive with just the accelerator” mode. So it’s not anything too worrying – just massively annoying. Massively, massively annoying. Especially annoying given the absolutely atrocious condition that British roads are in.
After combing the UK Tesla owners group posts several people were suggesting it was either a dodgy ABS sensor or a loose earth connection on the 12v battery. I checked the battery – no problem there. So I decided to jack the car up and re-seat the sensors.
This is me mid unplugging and replugging the sensors
After unplugging and re-plugging the sensors I took it for a test drive. Before the work you had to hit something with quite some force to send the car mental. After the work you had to just glance in the direction of a pothole and the car would have a meltdown. I’d made it worse. Oddly though this actually encouraged me. It made me think I was messing about in the right area.
I bought a couple of new ABS sensors on eBay for £30 and then me and the boy decided to jack up the car and do the drivers side first. After doing the drivers side sensor I took it for a test drive. First bump in the road….nothing. The place where it usually goes on the drive to the high school….nothing. Speed bumps which would always trigger it…..nothing.
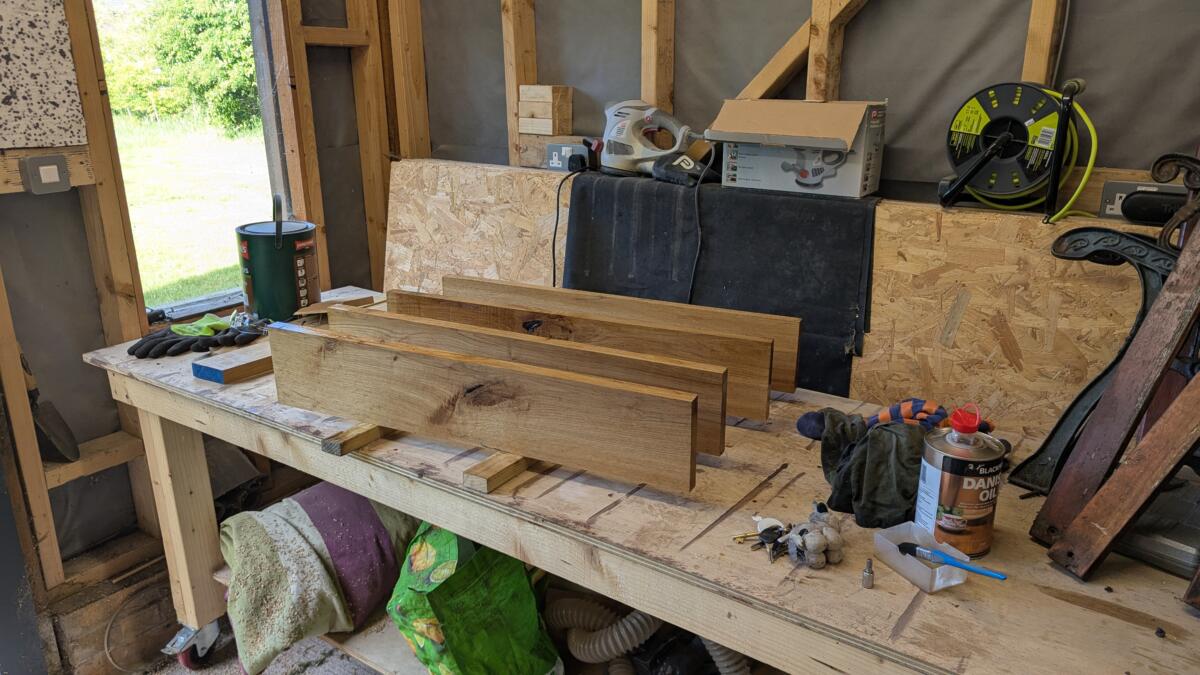
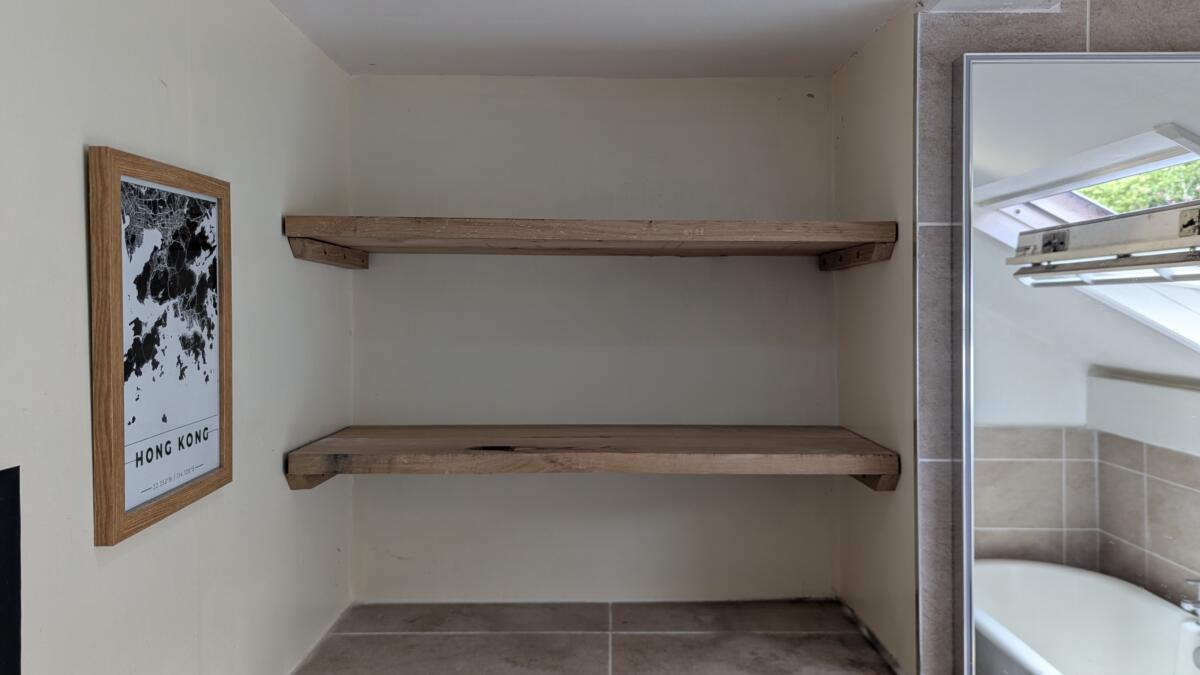
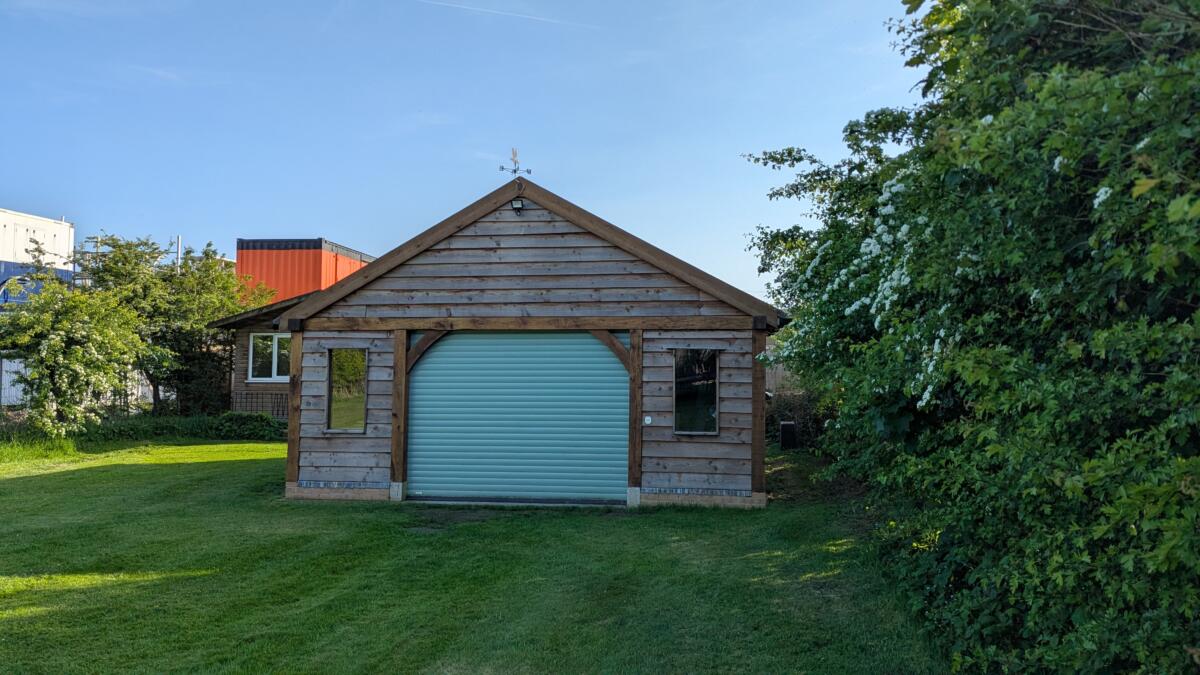
We’ve always had this space in our bathroom that was just crying out for some shelves. I just happened to have an Oak beam left over from my Workshop build which would turn into some rather lovely shelves.
So I popped around to Dan’s house and we machined the beam into some usable planks
.
This is how they looked after I chopped them to size and Danish oiled them.
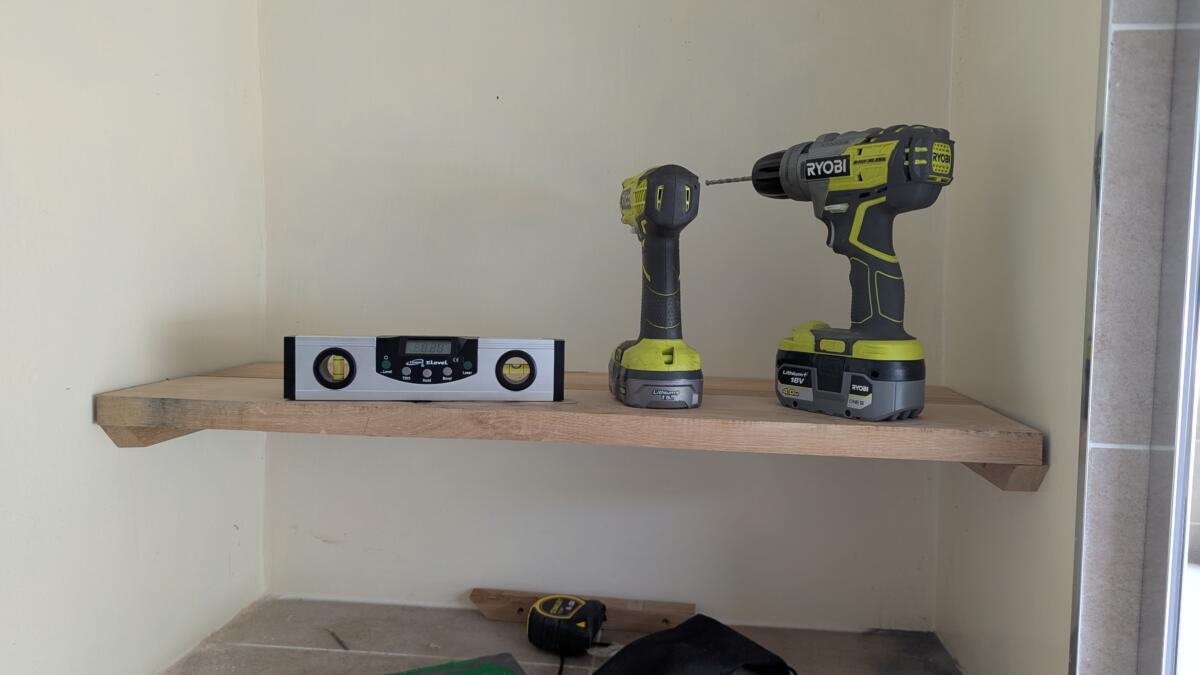
The next step was to fashion some supports and break out the digital spirit level that I borrowed off Jason Howarth.
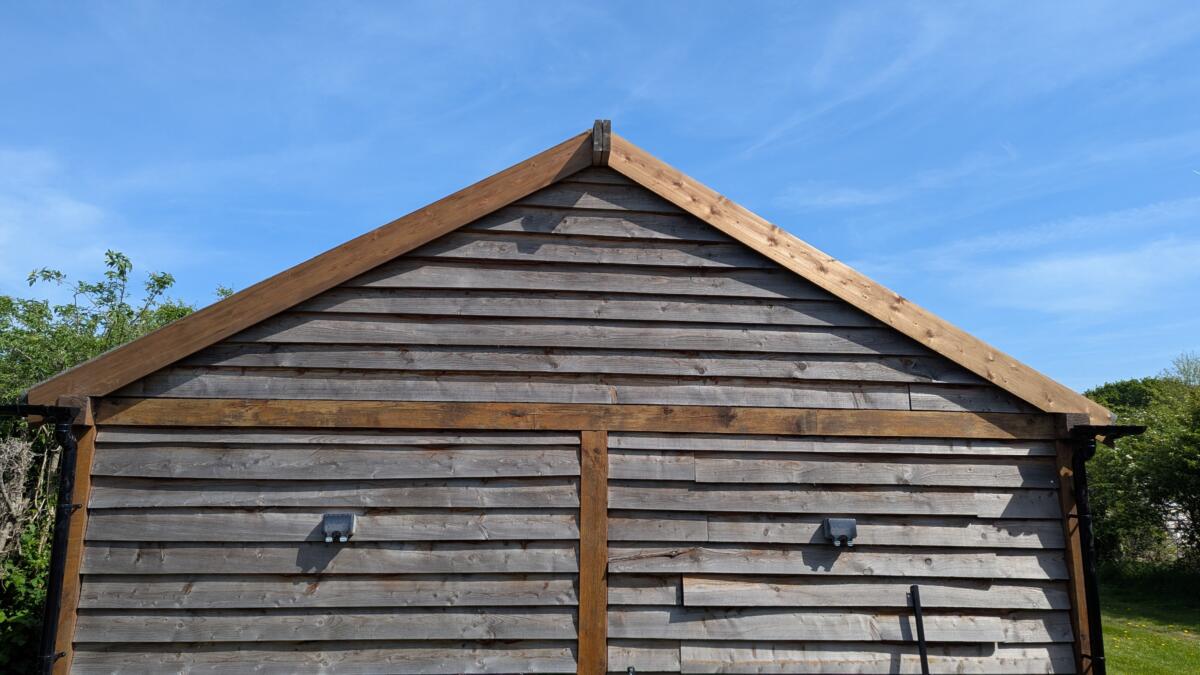
It was about two years ago that I started building my workshop and pretty much managed to complete it in six months. I say “pretty much” because I never quite got around to putting fascia boards on it so the front and back roofy bits always looked a bit scruffy.
Well….no more
So the fascia boards are the bits of wood that make the top triangle.
Now you can see that because I didn’t know what I was doing I didn’t put a load of nails into the cladding which is why you can now see a bunch of the boards starting to warp. Fortunately I still have some nail gun nails so I’ll have to rent my favourite power tool from Hodgsons, mark out where the stud walls are and then shoot a load more nails in. Sounds like a job for the Summer.
For those people old enough to remember the halcyon days of mobile gaming, Angry Birds, Cut The Rope, et al before the developers got all greedy with In-App purchases and adverts every 30 seconds, will surely remember Plants v Zombies.
For those that do remember PvZ then you will surely remember the opening audio to each level “The zombies…are coming”. Well, ummm, I kinda changed it to be “The Chillis … are coming”
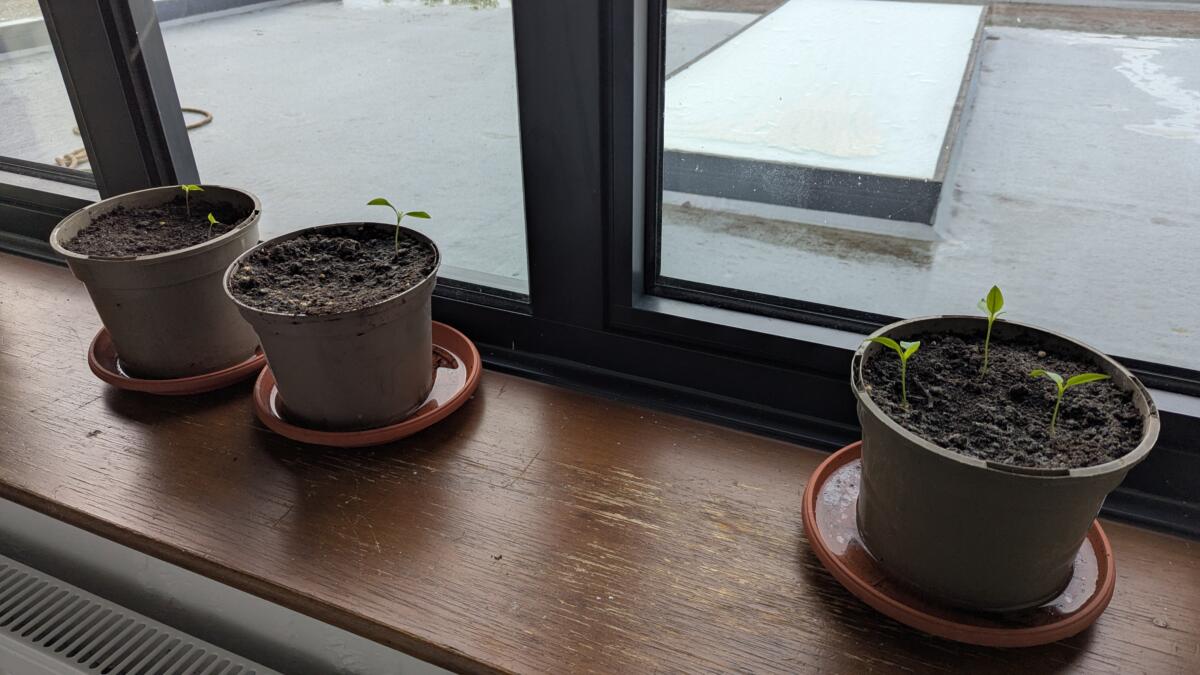
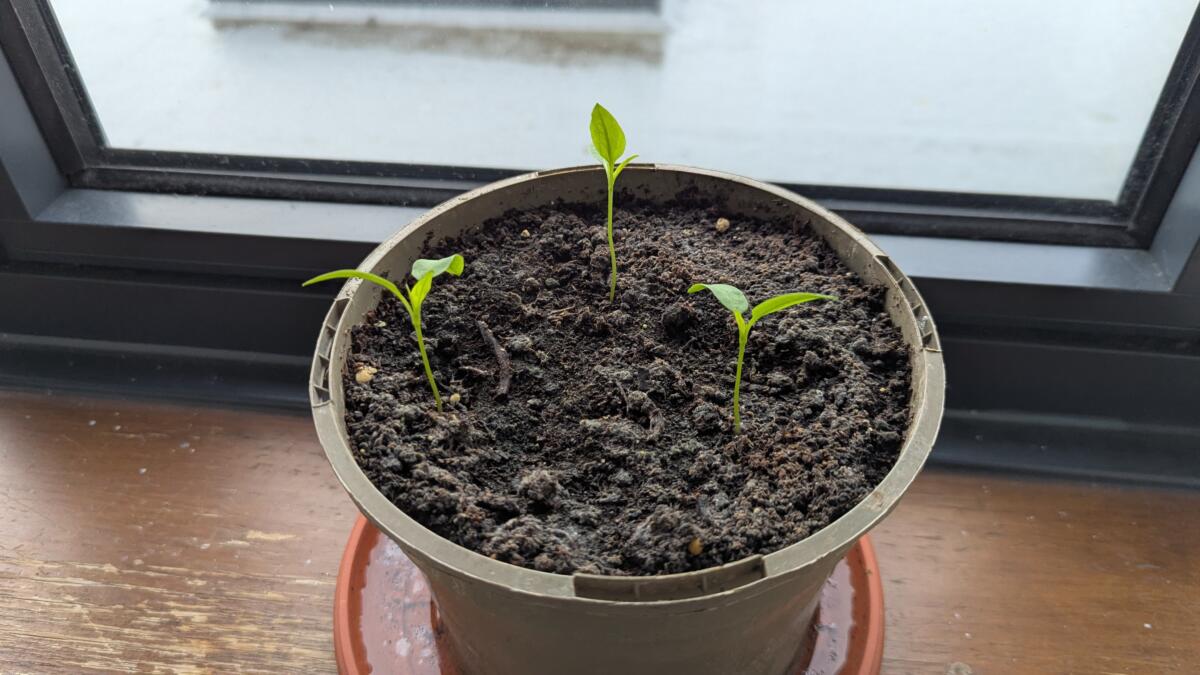
Some Scotch Bonnet and some finger chilli – not sure which is which yet
Earlier I pondered if the seeds in the Chilli’s from Aldi would germinate. Turns out they did.
Being the early rising dutiful husband that I am I often greet Emma with a cup of tea in the morning. On normal days I’ll have a quick look at what time she set the alarm for and I’ll make tea and take it upstairs just in time to switch off her alarm and then we settle in with tea to do the Guardian crossword.
This is fine except for weekends. She doesn’t set an alarm on weekends. So I’d always in the past try and pick a reasonable time and wander up. This seldom worked out. She’d either be fast asleep or she’d come downstairs before I made tea. This situation could not persist.
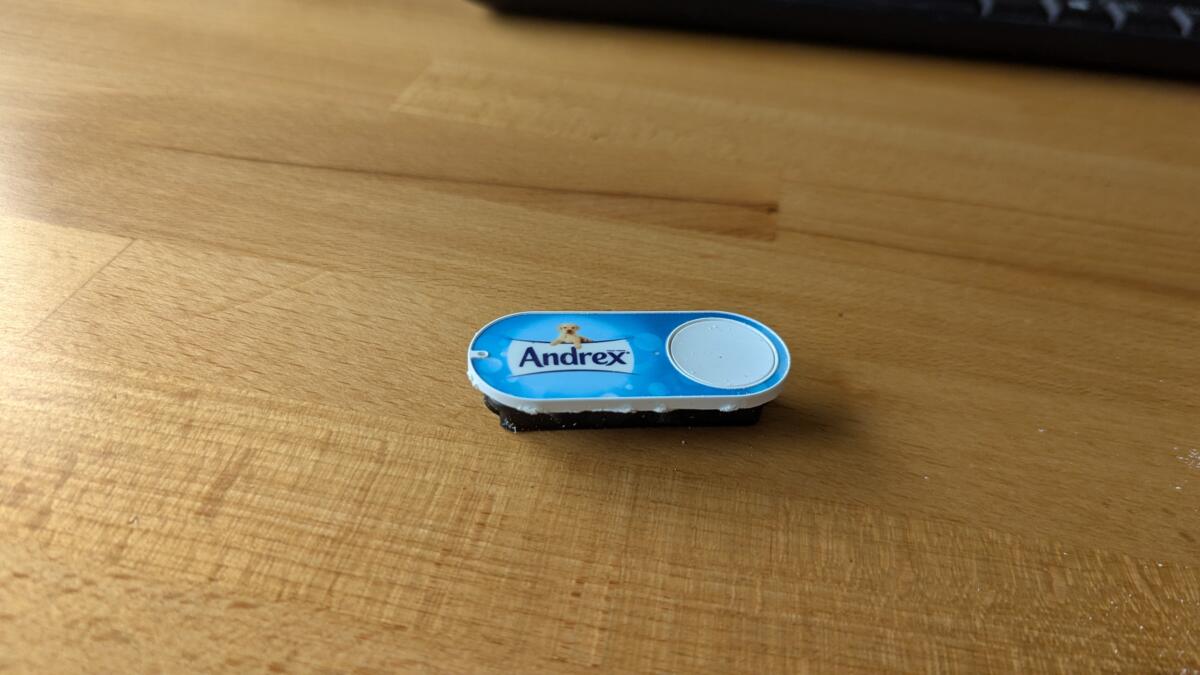
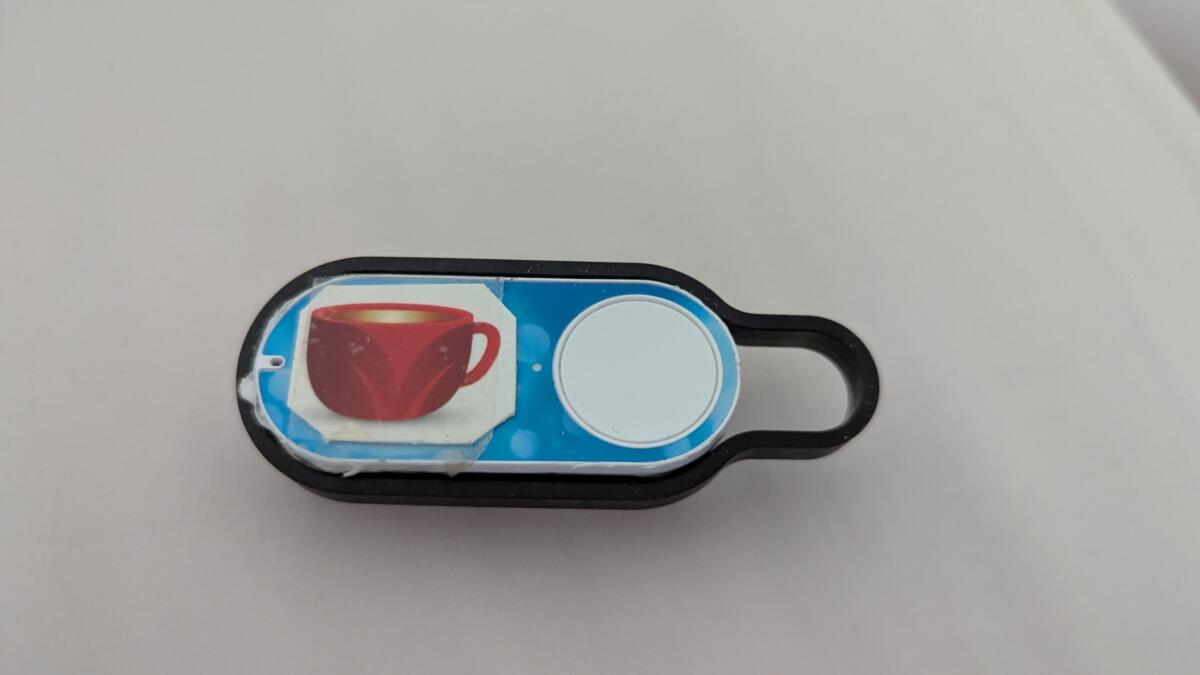
A long long time ago Amazon released these really quite cool things called “Amazon Dash Buttons” where you would hook them up to your WiFi and when you press the Dash Button it would contact the Amazon Mothership and order you another whatever, box of teabags, toilet roll, dishwasher tablets – whatever it was set up for.
So I bought one on eBay.
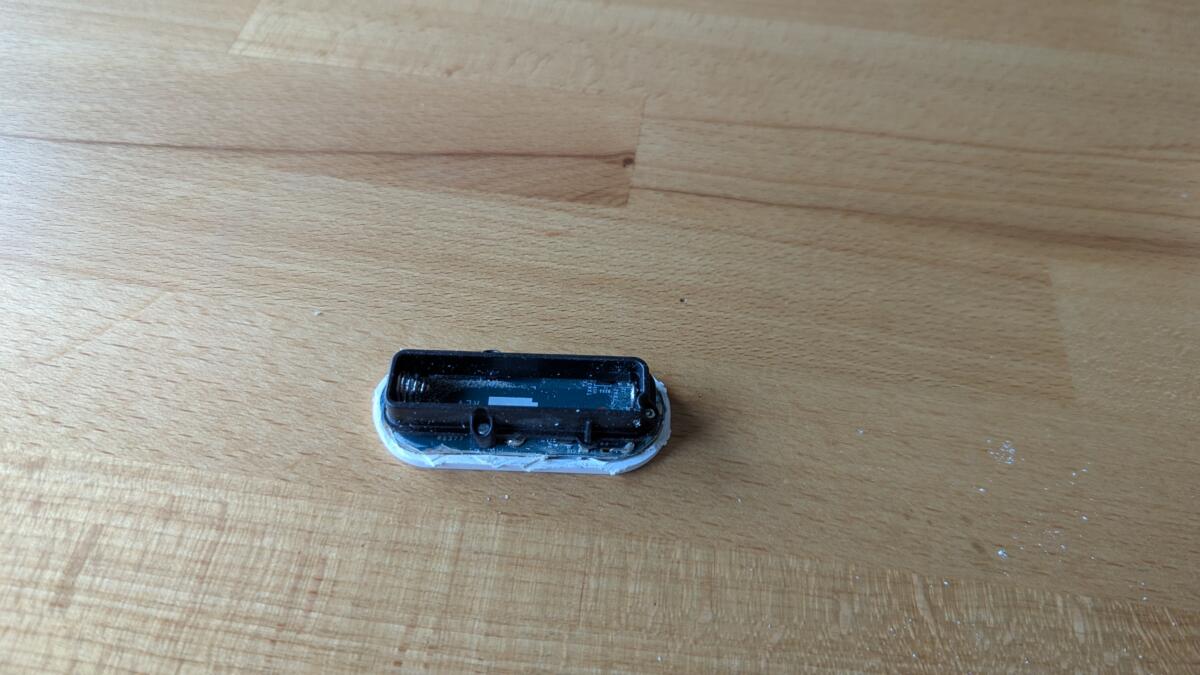
A lot of the info on the web talked about them having a soldered in flat battery which was going to be a pain. After taking my Dremel to the button I discovered that the version I had was filled with a AAA battery. So I replaced the battery and got to configuring my firewall so that the MAC address of the Dash Button couldn’t get outside my network since it seems Amazon are being a bunch of dicks about this sort of thing and remotely bricking any devices that contact the server.
After much hacking involving playing some audio into the Dash Button, performing a factory reset, and then using a Python script to configure the button for my IOT network I had the beginnings of a solution. I have a Raspberry Pi that was already doing a few things and now it also sits and listens for an ARP packet from the MAC address of the Dash Button. When it receives the ARP it will then call a Telegram script that I wrote which will message my phone with a “Bring Tea” message.
So far so good – but there’s no ACK. I could go to the bottom of the stairs and shout up “OK, tea incoming” but that would just wake everyone else up. So I released the hounds…well hound.
Violet, our pet Whippet loves getting in bed with us when we’re doing the crossword. So the sequence of events is now:
Emma wakes up.
Presses the tea button.
I open the door for Violet and she runs upstairs and gets in bed with Emma
I make tea and take it upstairs.
We complete the crossword and the nine-letter anagram.
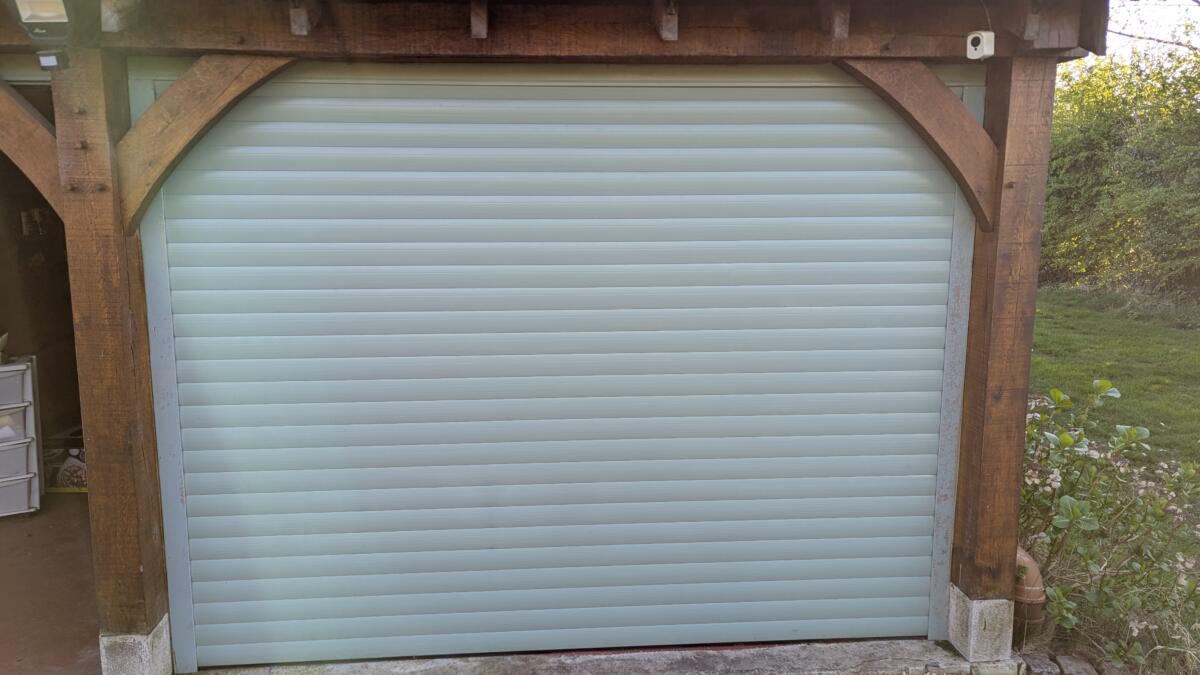
Not long after it started getting these minging scuffs on the front of it making the whole garage door look a bit rubbish. I couldn’t work out what was causing the problem so every now and then I’d give it a lick of spray paint and it would nice again, for a while.
Recently one of the locking straps snapped so I took it all apart and discovered that some of the plastic circle things that hold the locking straps in place had snapped too. So I ordered a bunch of bits from eBay and set to work. Whilst I was doing all this I noticed that there were scuff marks on the inside of the steel housing that corresponded with the scuff marks on the door. That was it! That was what was cacking up my doors. Upon closer inspection it seemed the top part of the steel housing was bowing down a bit – no idea why but I put a small hole in it with a metal drill, stuck a 100mm torx screw through the hole and screwed it into a roof support above. Screwing the screw in raised the housing top higher and no more scuffing occurred. A jet wash and a bit of spray paint later and we have this
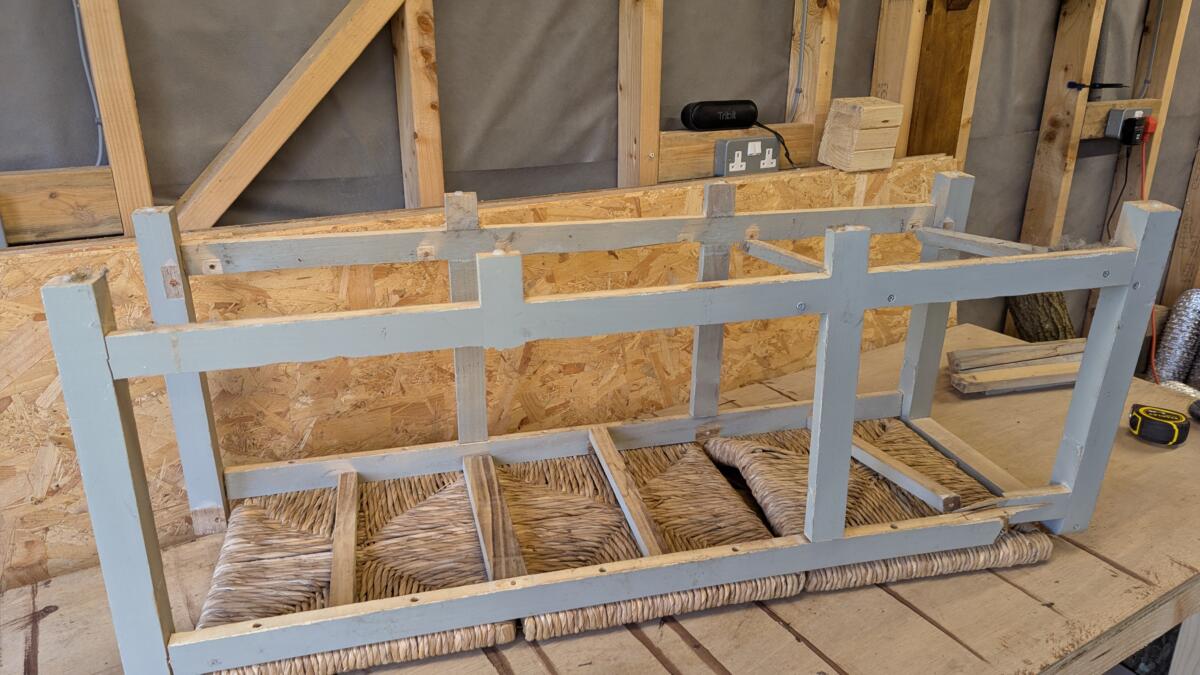
Many years ago we bought a shoe rack basket type thing. Over time it fell apart and I did a patch up job on it with a few screws. It didn’t work very well and started falling apart again. The final straw came when Amelia fell onto it and the whole thing just crumbled and and fell apart. Emma wanted to put it in the bin. I wanted to do a proper fix up job on it.
Bits missing, wood snapped – this will not do
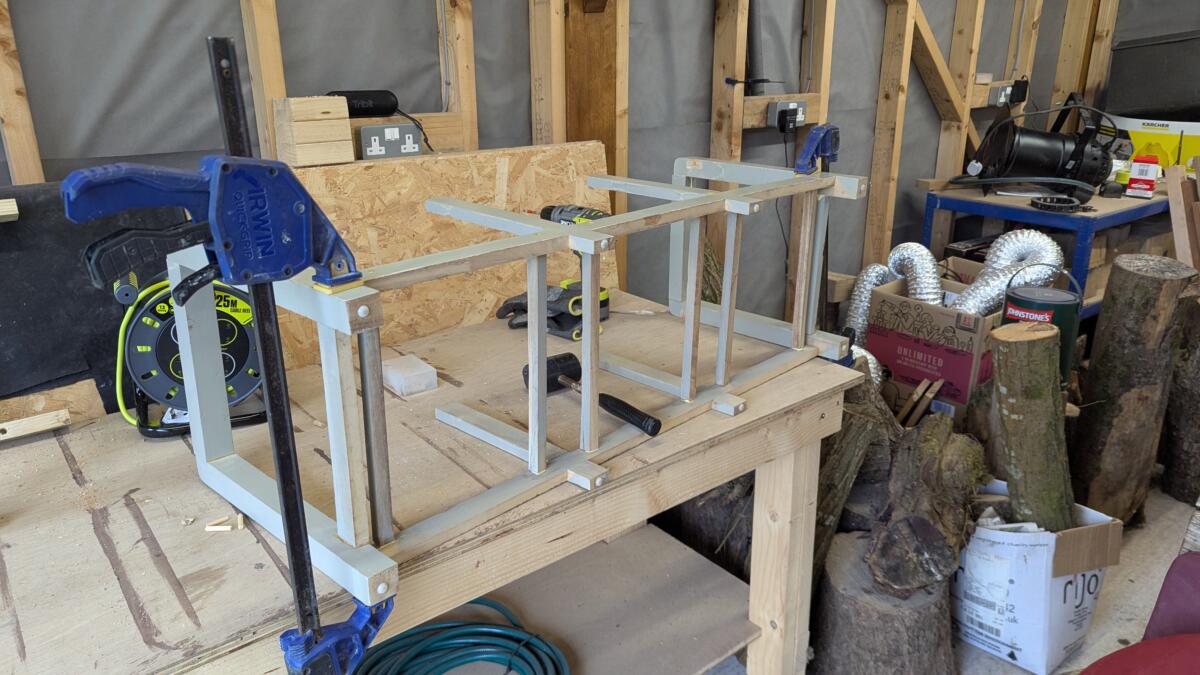
Starting to put it back together. Glued and dowelled. No screws whatsoever…well, except to hold the wicker seats on.
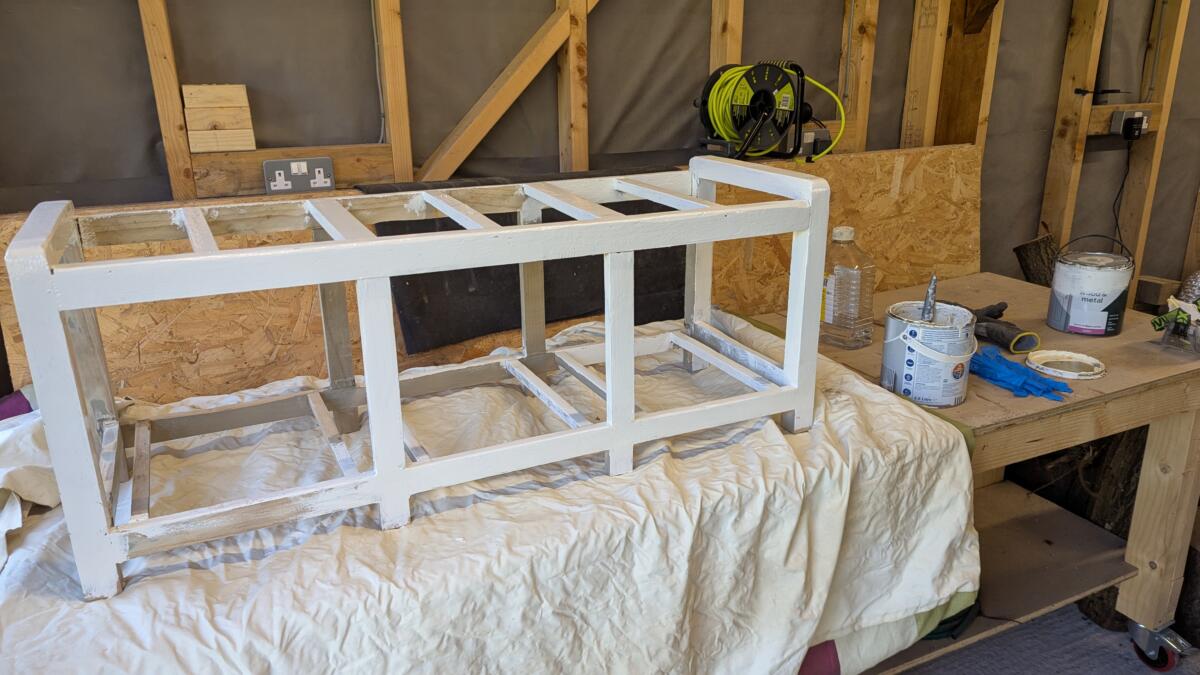
Almost back together. Undercoat being applied.
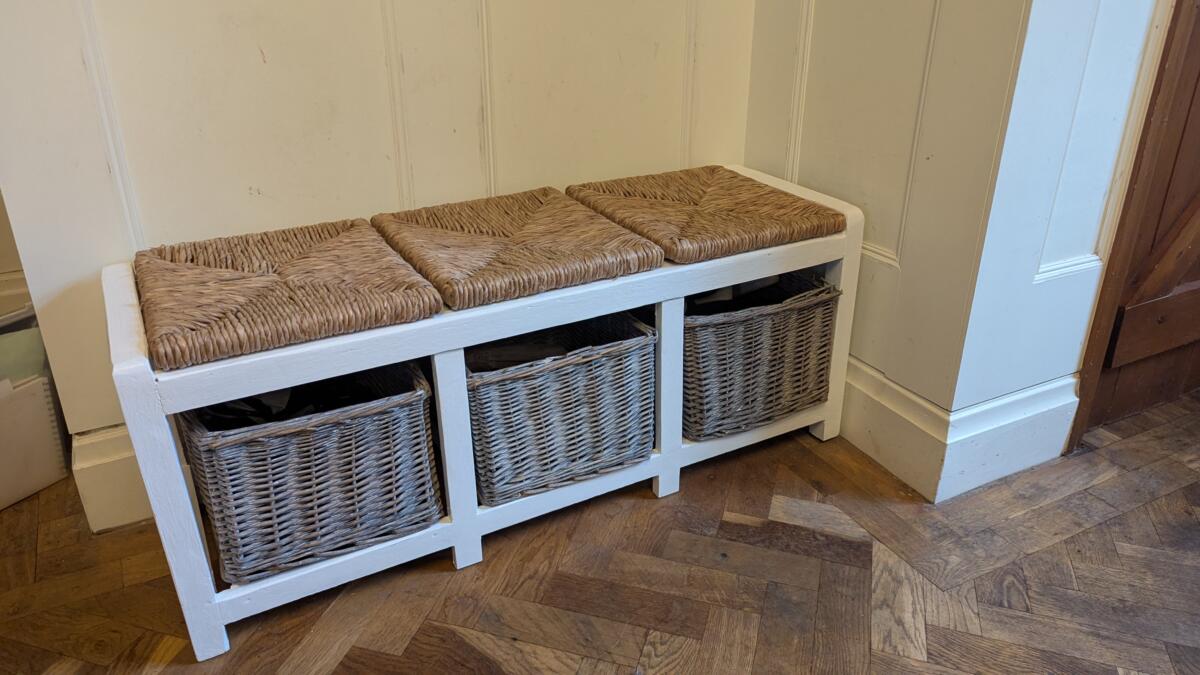
The finished piece. You can sit on it and everything.
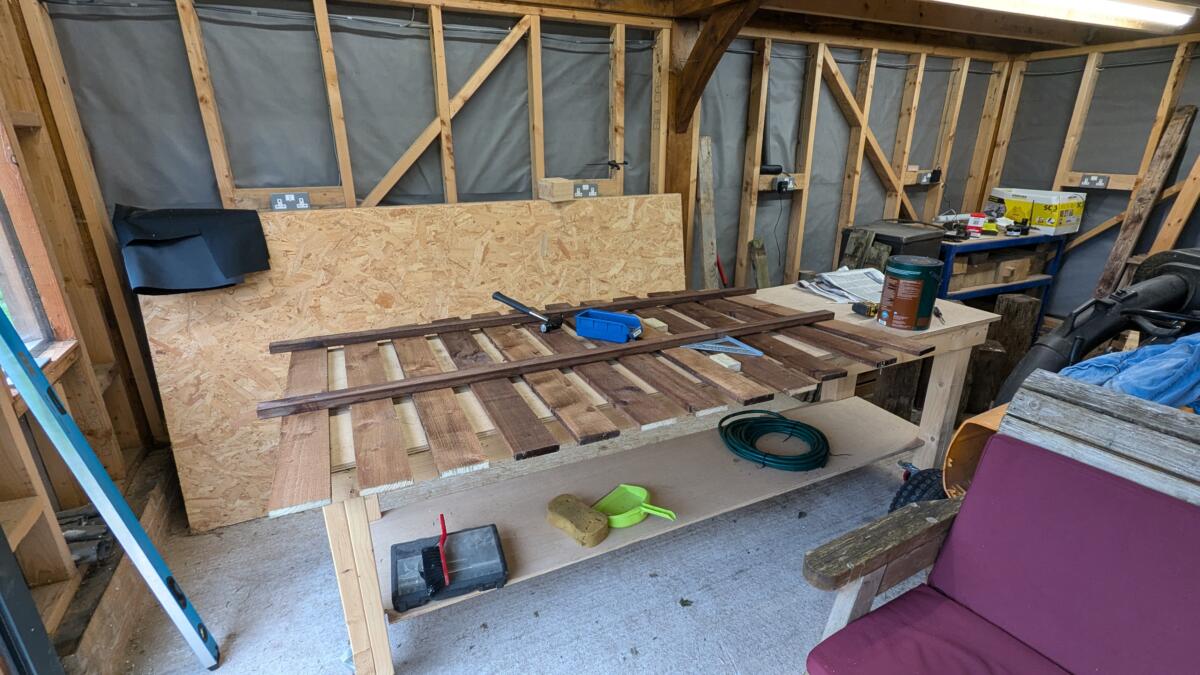
Aside from making completely new fence panels it also seems I’m quite the dab hand at taking old knackered fence panels and bringing them back to life
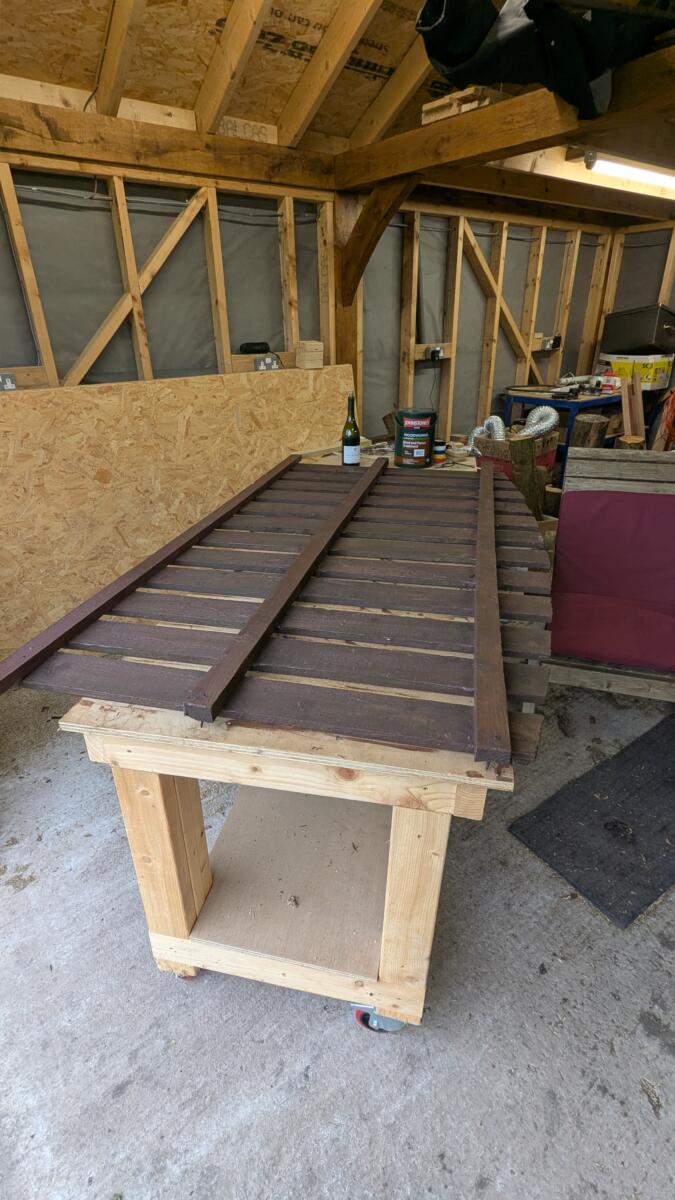
I had to use my planer to take 20+ years worth of weathering off the fence panel. Then replace one of the back support thingys with some new 2×1 and finally give the whole thing a coating of fence paint – all of which was accomplished with the help of a fine bottle of Burgundy that can be seen in the background. Better thing…Burgundy…Workshop…Agog to Learn
When we remodelled the driveway there were some casualties. Namely several fence panels that had over the years been ravaged by the elements and by ground ivy. So rather than buying new fence panels at ridiculous post pandemic prices, I thought I’d make my own.
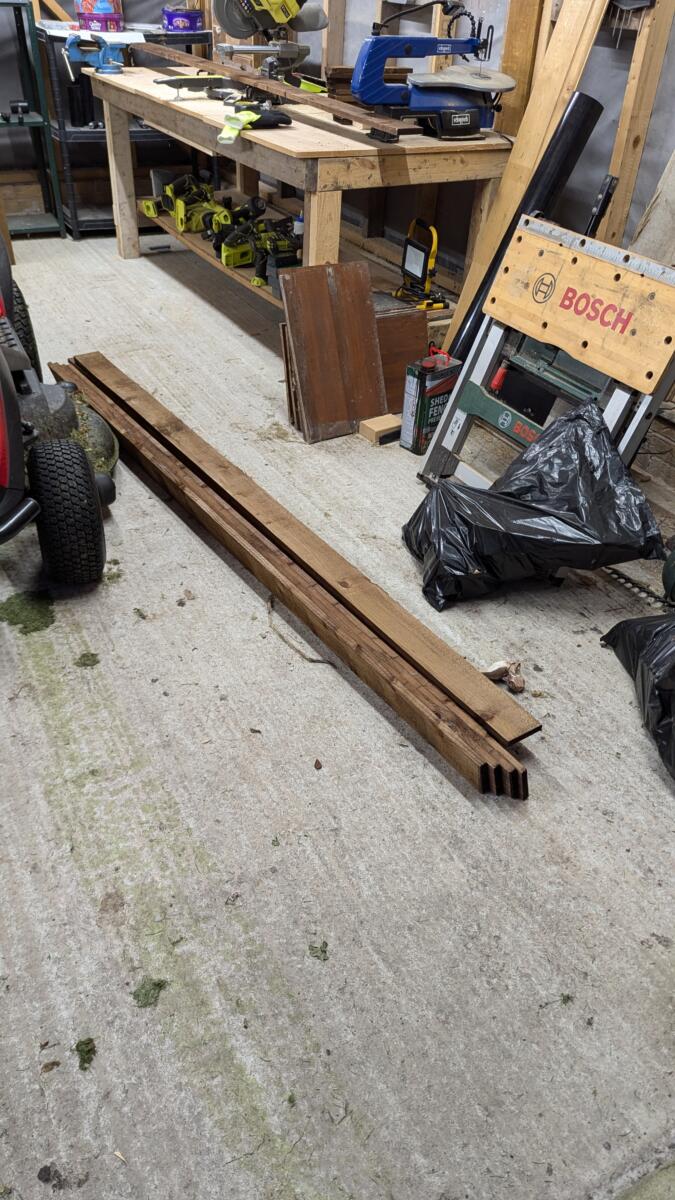
A few of the 1.8m rough sawn 100×18 softwood planks that will be making part of my fence panel
I took some measurements off one of the old weather damaged fence panels and set up my trusty mitre saw to do some cuts.
Chopped in half ready to have the top angle cut out.
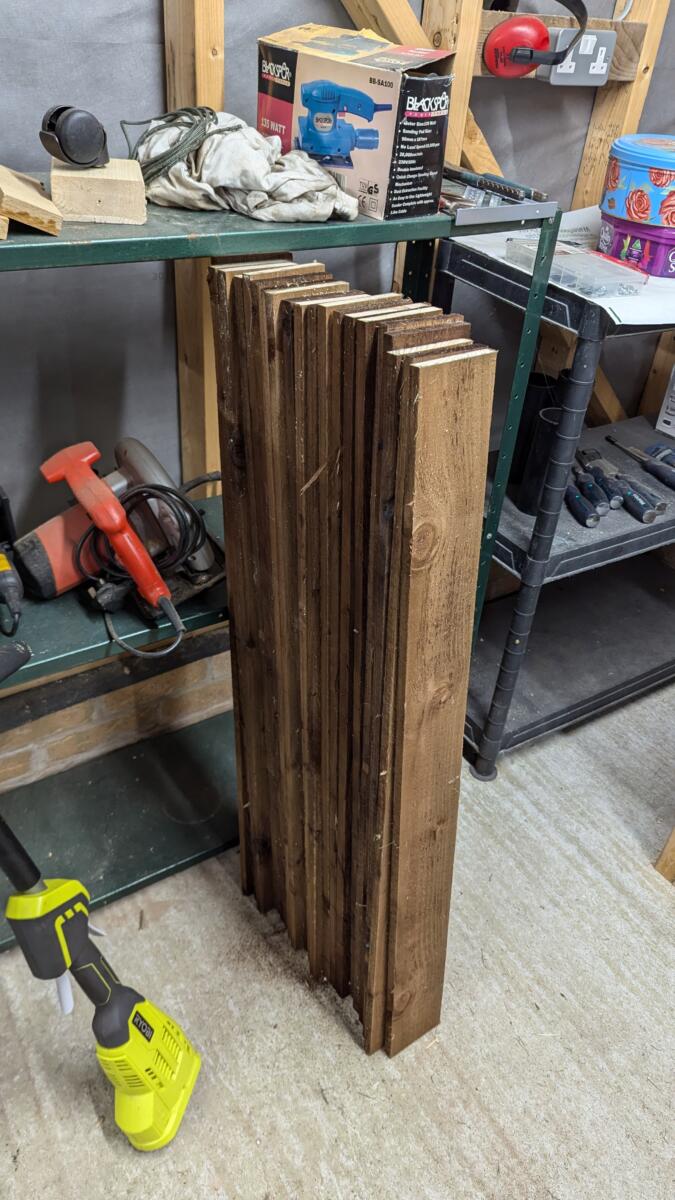
When I first started building a panel I would chop all the planks in half. Then I’d set the angle on the mitre saw, then I’d chop individual planks one at a time always measuring and remeasuring the place where the cut is going to be.
By the time I’d got to my 5th fence panel I’d built a rudimentary jig to hold the planks and was cutting through them 3 or 4 at a time. It got a lot faster to build each panel!
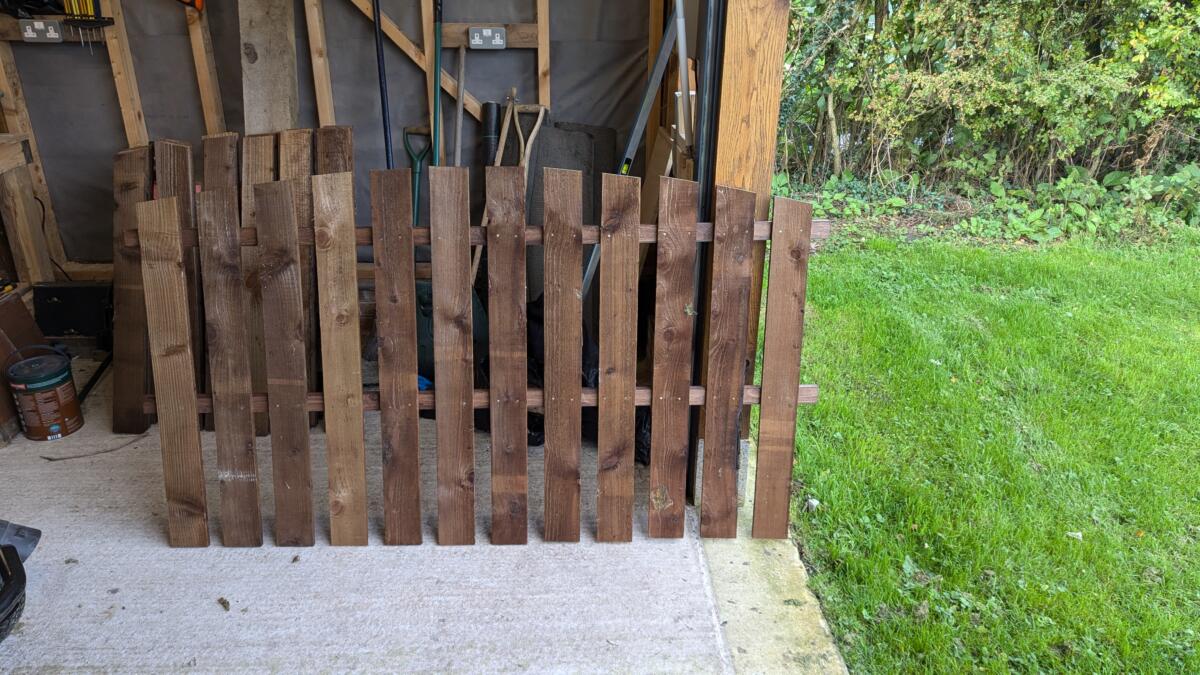
The first ever fence panel. It’s not completely finished as I had three supports across the back and there’s only two in the picture above.
In a similar vein when it came to assembling the panel I was pretty slow for the first few, but after each panel I learned a new time saving trick and also got a bit more accurate so the later panels were much faster to put together and a lot straighter.
See that workbench the fence panel is resting on? I built that workbench and put castors on it and everything. Thing of beauty.
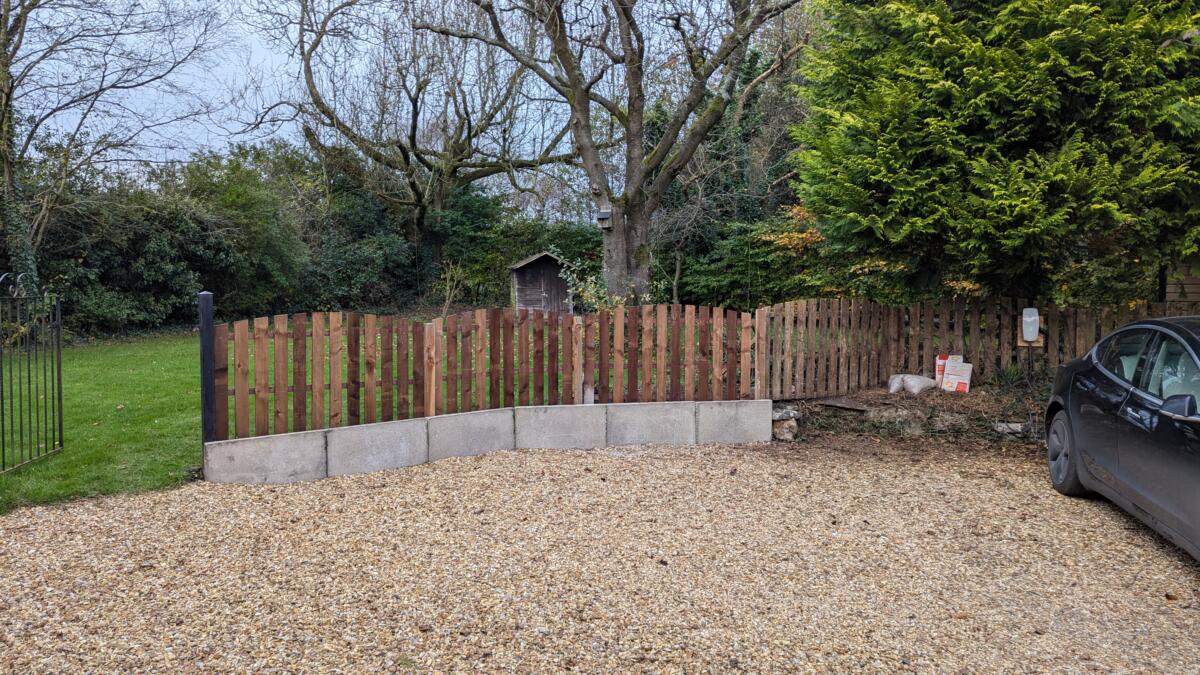
Finally I got around to digging some holes, buying some 75×75 fence posts and a few bags of postfix. I know hand mixing concrete apparently makes for a better, more secure fence post but you just can’t argue with the simplicity of “dig a hole, throw some water in, add your fence post, throw some postfix in and maybe a bit more water and you’re done”
The more or less finished job. I had to put a few more panels up off to the left of the picture above but you get the idea. The fence panel planks have been pressure treated to greater or lesser degrees which is why there is some colour variation but I suspect they’ll all fade to the same colour after a year or two. I don’t really mind though, quite like the multi coloured fence panels.
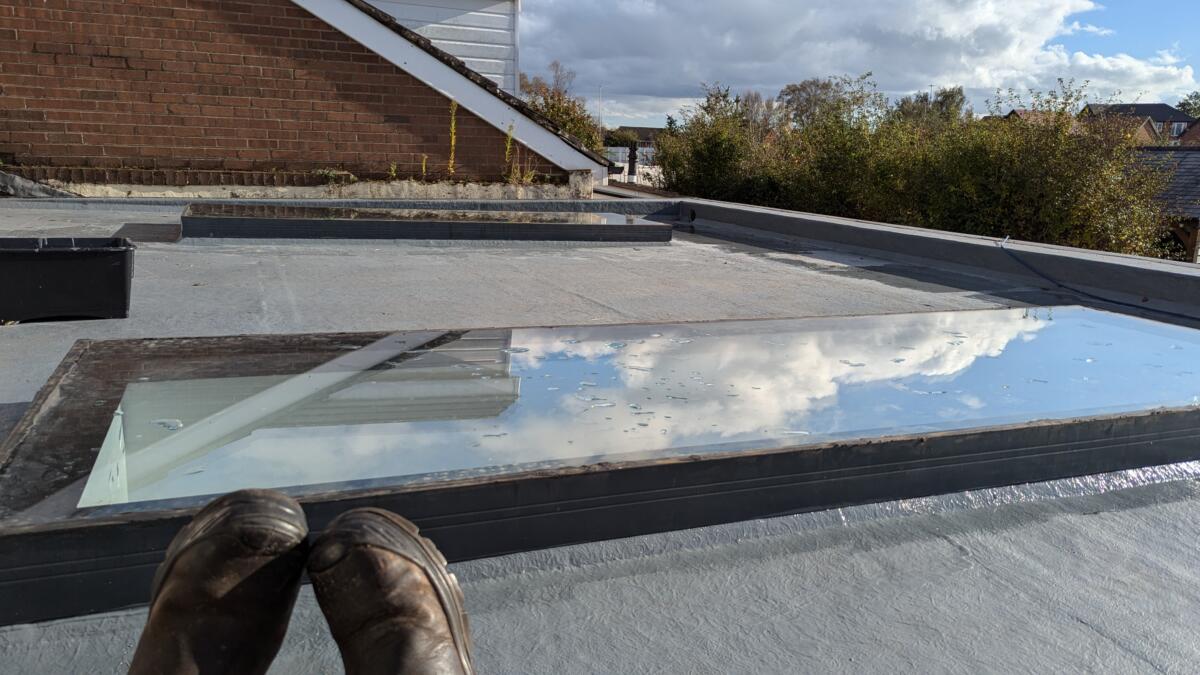
Quite a long time ago, before we went sailing in Croatia, I started painting the flat roof that the lazy bastard roofer couldn’t be bothered finishing. It began here
Well finally….finally….absolutely finally I got around to finishing it off. It was an enormous relief – something that had been preying on my mind for quite a while so I finally got myself together and did the final touch up under the roof-lights. It didn’t take long, not half as long as I thought it would, and it’s turned out quite well.
I sat on the roof with a can of Stella or two beneath a beautiful blue sky on a crisp autumnal day and I was truly happy.
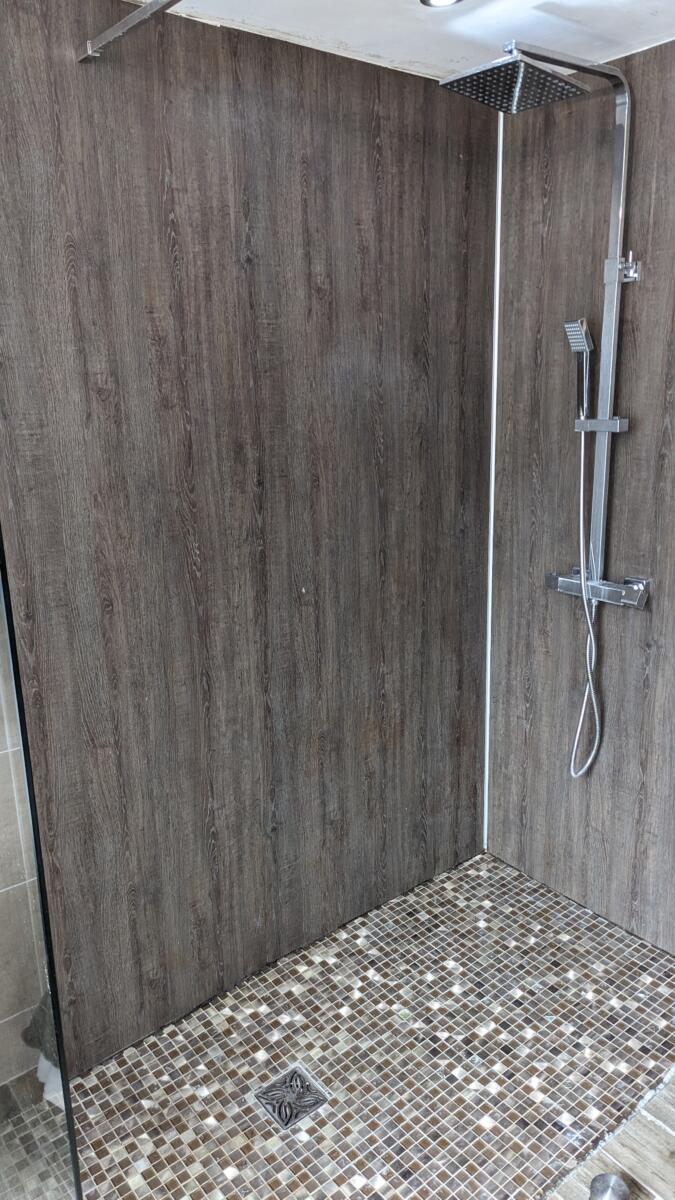
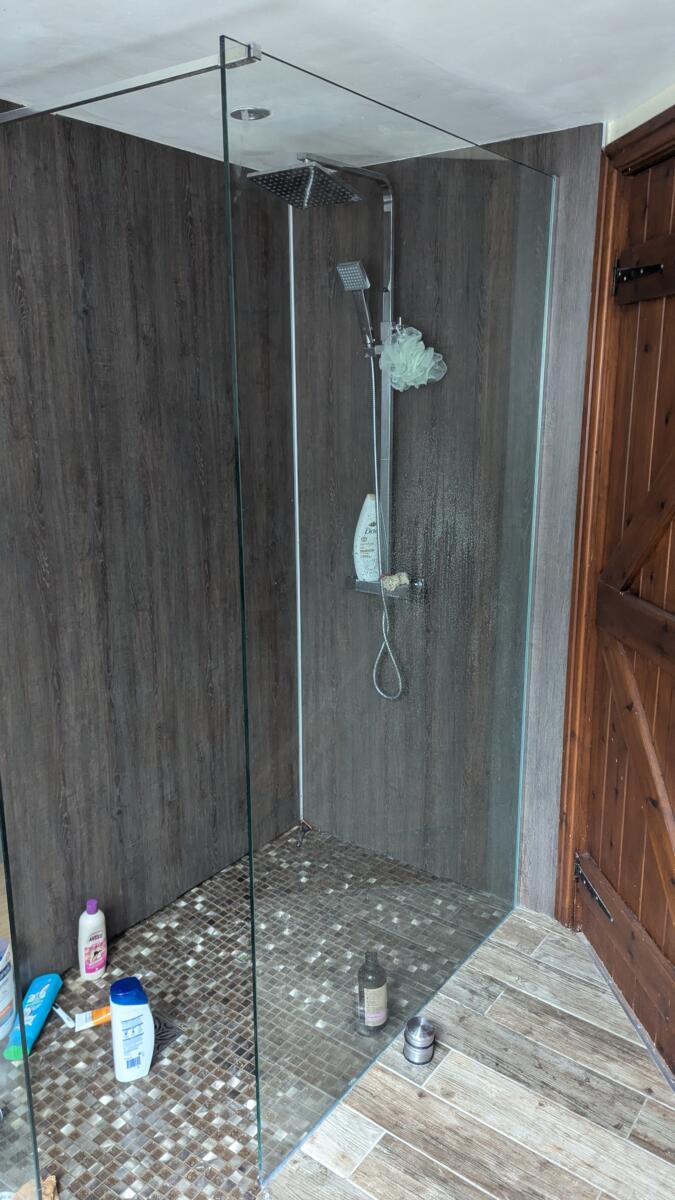
I spend my entire life fixing stuff. I’m absolutely convinced that when I leave the house my family just wander around with a hammer smashing stuff. This time they didn’t even wait for me to leave the house. I was in bed when I heard a huge crash. Sounded like a light aircraft had crashed into the side of the house. Turns out it was just the shower screen and “nobody” was in the bathroom. It was either Emma crashing the door into the screen or the resident ghost Maude
Anyway, this was the result:
After really rather a lot of tidying up we ended up with a shower that was vaguely usable but fortunately we also had a proper backup electric shower downstairs. Anyway – the upstairs clean up looked like this:
After far too long waiting for a delivery of a new piece of glass and a rather talented plumber/bathroom fitter coming to sort it out we are now able to wash our stinky Steele bodies upstairs again.